Mobile App Tester is an app that ensures a mobile app works on various types of devices before and after it launches. The app provides a live view of Android or Apple mobile devices with various screen sizes for testing.
Mobile App Tester is especially useful for Android devices where there are various manufacturers providing different device configurations.
How Can the Mobile App Tester Help Me?
At its core, Mobile App Tester alleviates the need to purchase various devices from Android and Apple for the purpose of testing.
By providing a live testing environment at no risk to the developer, the app can:
- Help detect and fix bugs, crashes, and errors prior to launch
- Show how the app behaves in real time without buying a device
- Test in other geographic locations and languages around the world
- Help create a perfect UI and UX
- Make sure an app works on Apple and Android devices
- Test app performance in various network strength conditions
Mobile App Tester saves developers and agencies time and money, while also ensuring the app is its best version before and after it hits the global market.
Pricing
You can try this app with a free 7-day trial. After that, Mobile App Tester costs $29 per month.
Security & Session Duration
The devices in the Mobile App Tester are physical devices that people can use remotely for a short period of time. And users can only interact with one device at a time. All physical devices are located safe and secure in Belgium, Europe.
You can use a single device for up to 60 minutes at a time. If the device is in use, a message will display in the dashboard. After 60 minutes, the session ends automatically.
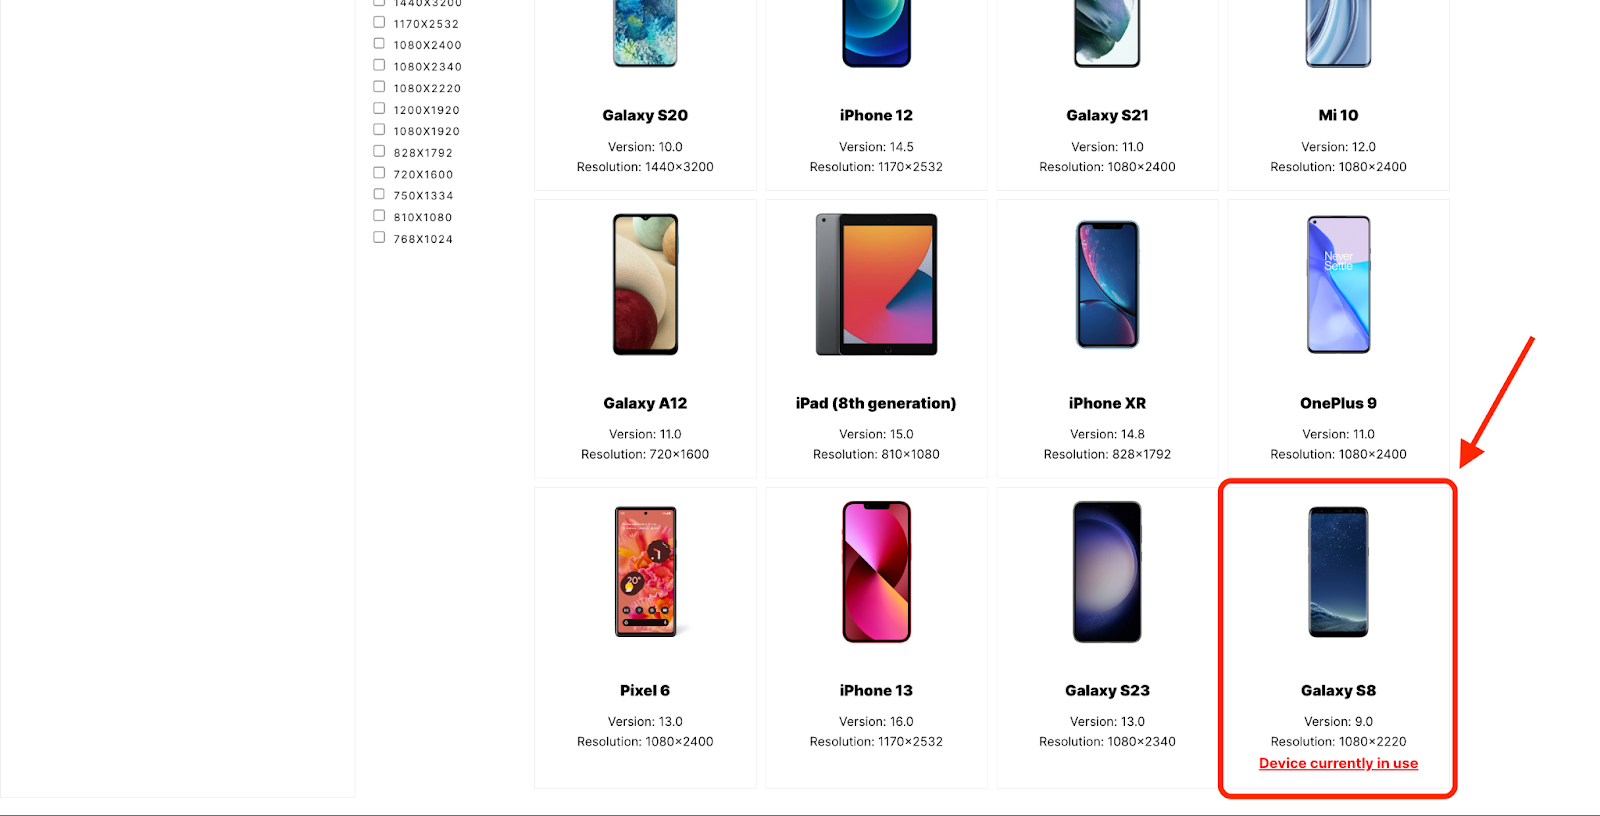
After the session ends, the app is removed automatically from the physical device, and the data is automatically reset.
When you are testing an app, no one has the ability to observe your actions or the history of your actions within your testing session.
You are able to use your own login credentials to get past a paywall. And once the session ends, your username, password, and email are erased from the app and reset so users cannot access your information.
Main Features
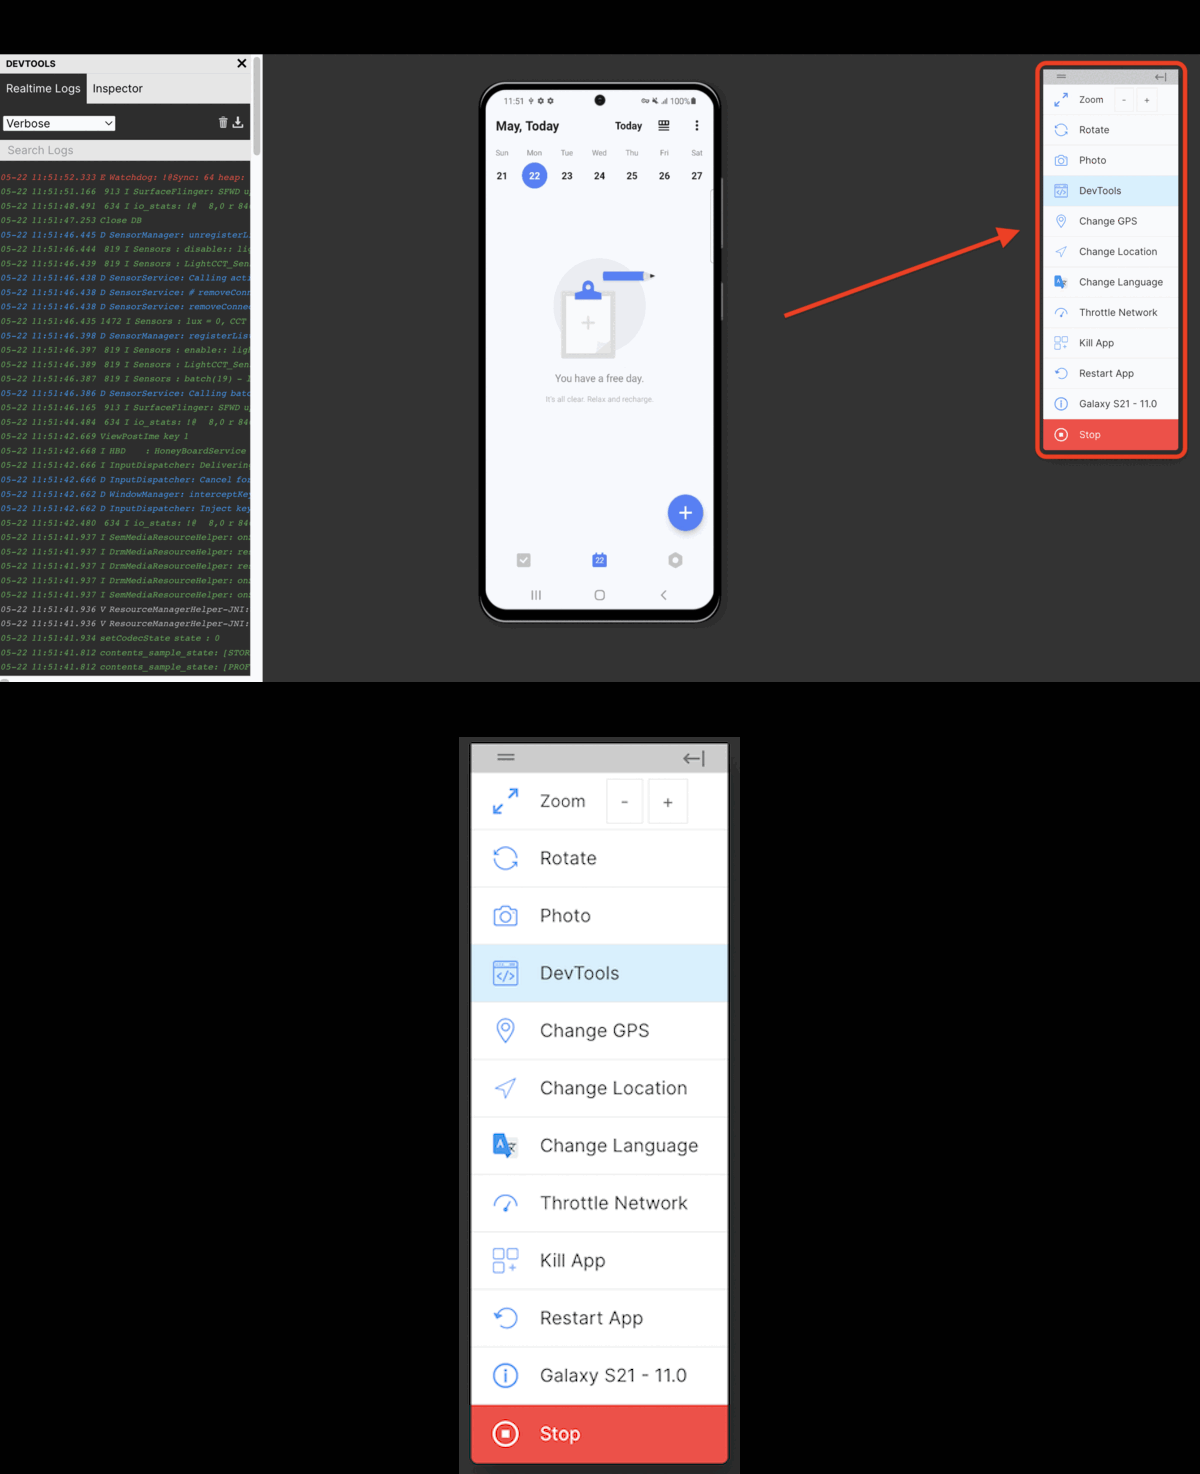
When testing the app, you will see the toolbar in the top right corner of Mobile App Tester complete certain actions.
In the toolbar, you can learn about the device you’re using, zoom in and out, rotate the device, take a screenshot, and change things like GPS, language, and location.
You can also:
- Access DevTools: gives you access to real-time logs and the inspector tab where you can view bugs, errors, warnings, etc.
- Throttle the network: allows you to change the connection speed in various conditions (remote, low connectivity, etc.)
- Kill the app: equivalent to force quitting an app by swiping up on your device and then swiping away the application. For further explanation, visit Apple Support
- Restart the app: reloads the app
- Stop the session: stops the current session
DevTools and Realtime Logs
In the DevTools, there is a dropdown with options that allow you to filter out issues you may be having with your app. This makes it easier for you to isolate issues without having to read through the entire log.
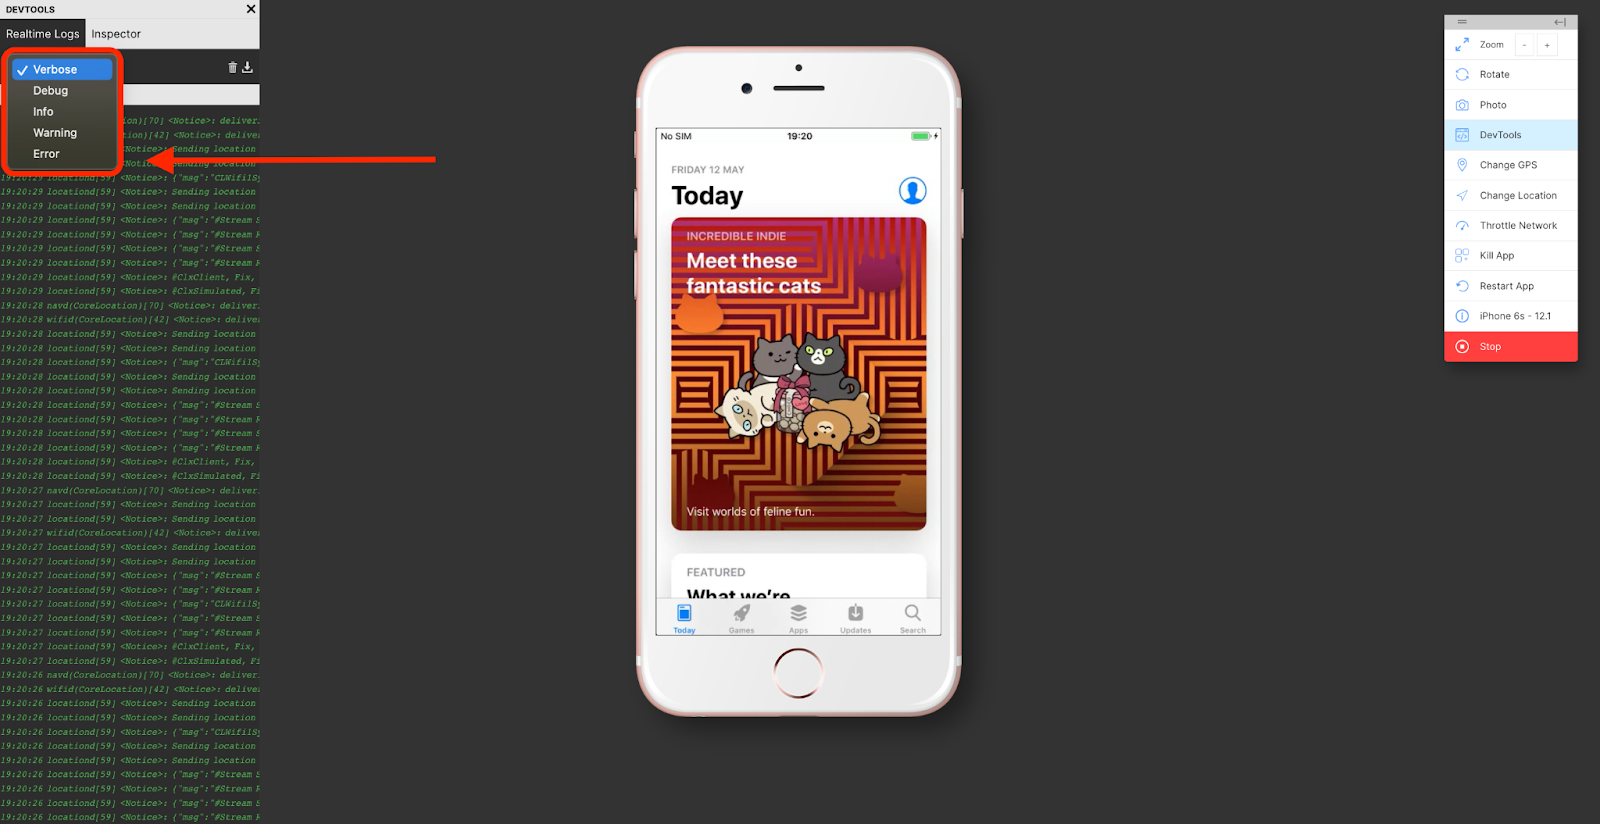
Some filters you will see include:
- Verbose
- Debug
- Info
- Warning
- Error
After you select the filter you would like to apply, the log will display the issues depending on which filter is chosen.
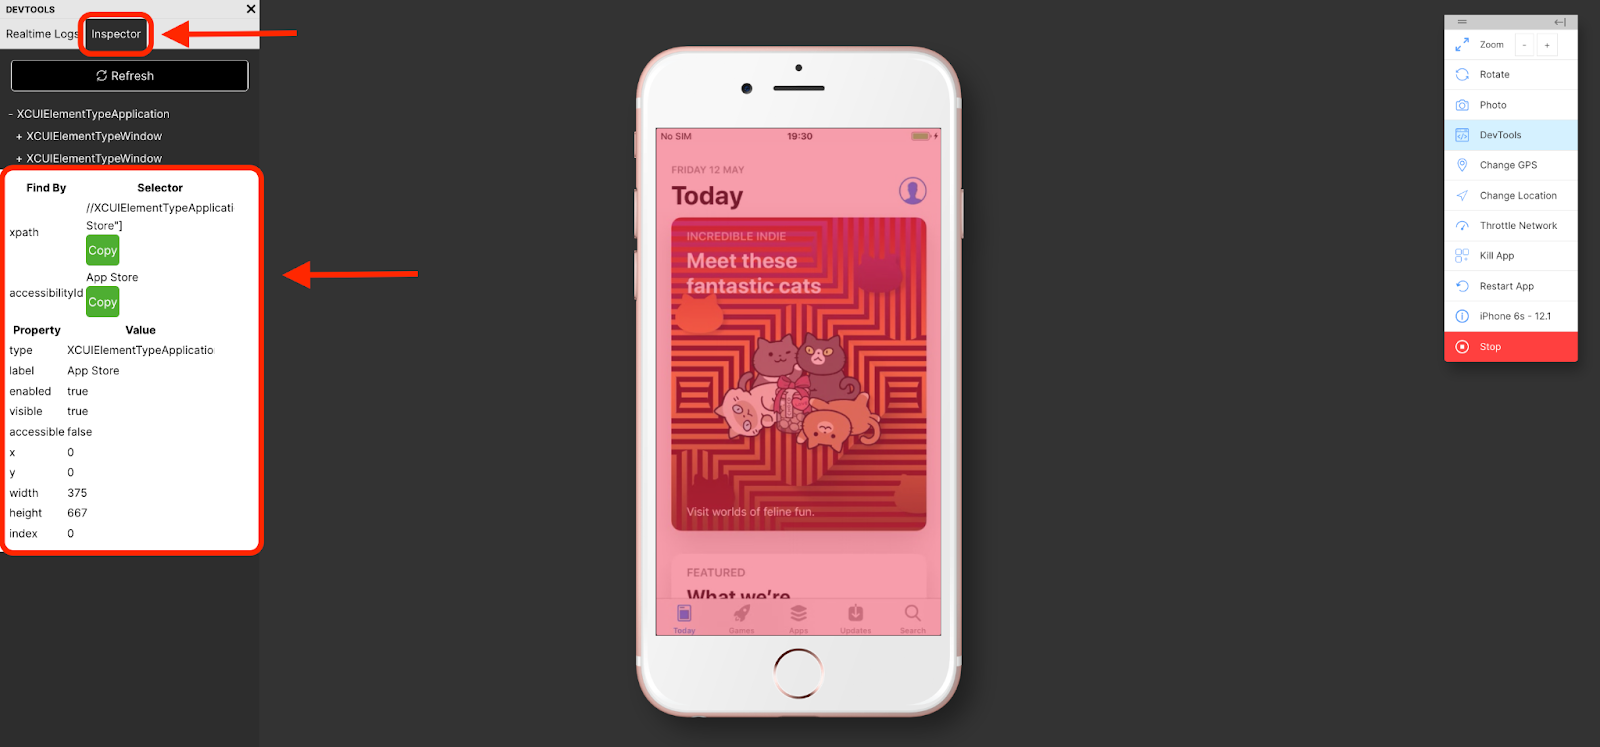
You can also inspect the app by selecting the Inspector tab.
Installing an App on a Test Device
There are three ways to upload a file in the Mobile App Tester: upload a file directly, install through TestFlight, or install through the App Store.
If you are uploading directly, be sure to have the correct file type. When uploading directly, the apps should be in the following file formats:
- .APK (ARM, ABI, Android)
- .AAB (ARM, ABI, Android)
- .IPA (iOS)
Any file size can be uploaded, but you won’t be able to upload a file if it is the incorrect file type.
Instructions for uploading your app via TestFlight, App Store, or Google PlayStore are below. However, you will need your Apple ID or Google login credentials in order to test an app using these uploading options.
Your app must also be uploaded to TestFlight, App Store, or Google PlayStore in order to use these option for testing.
How To Test an App
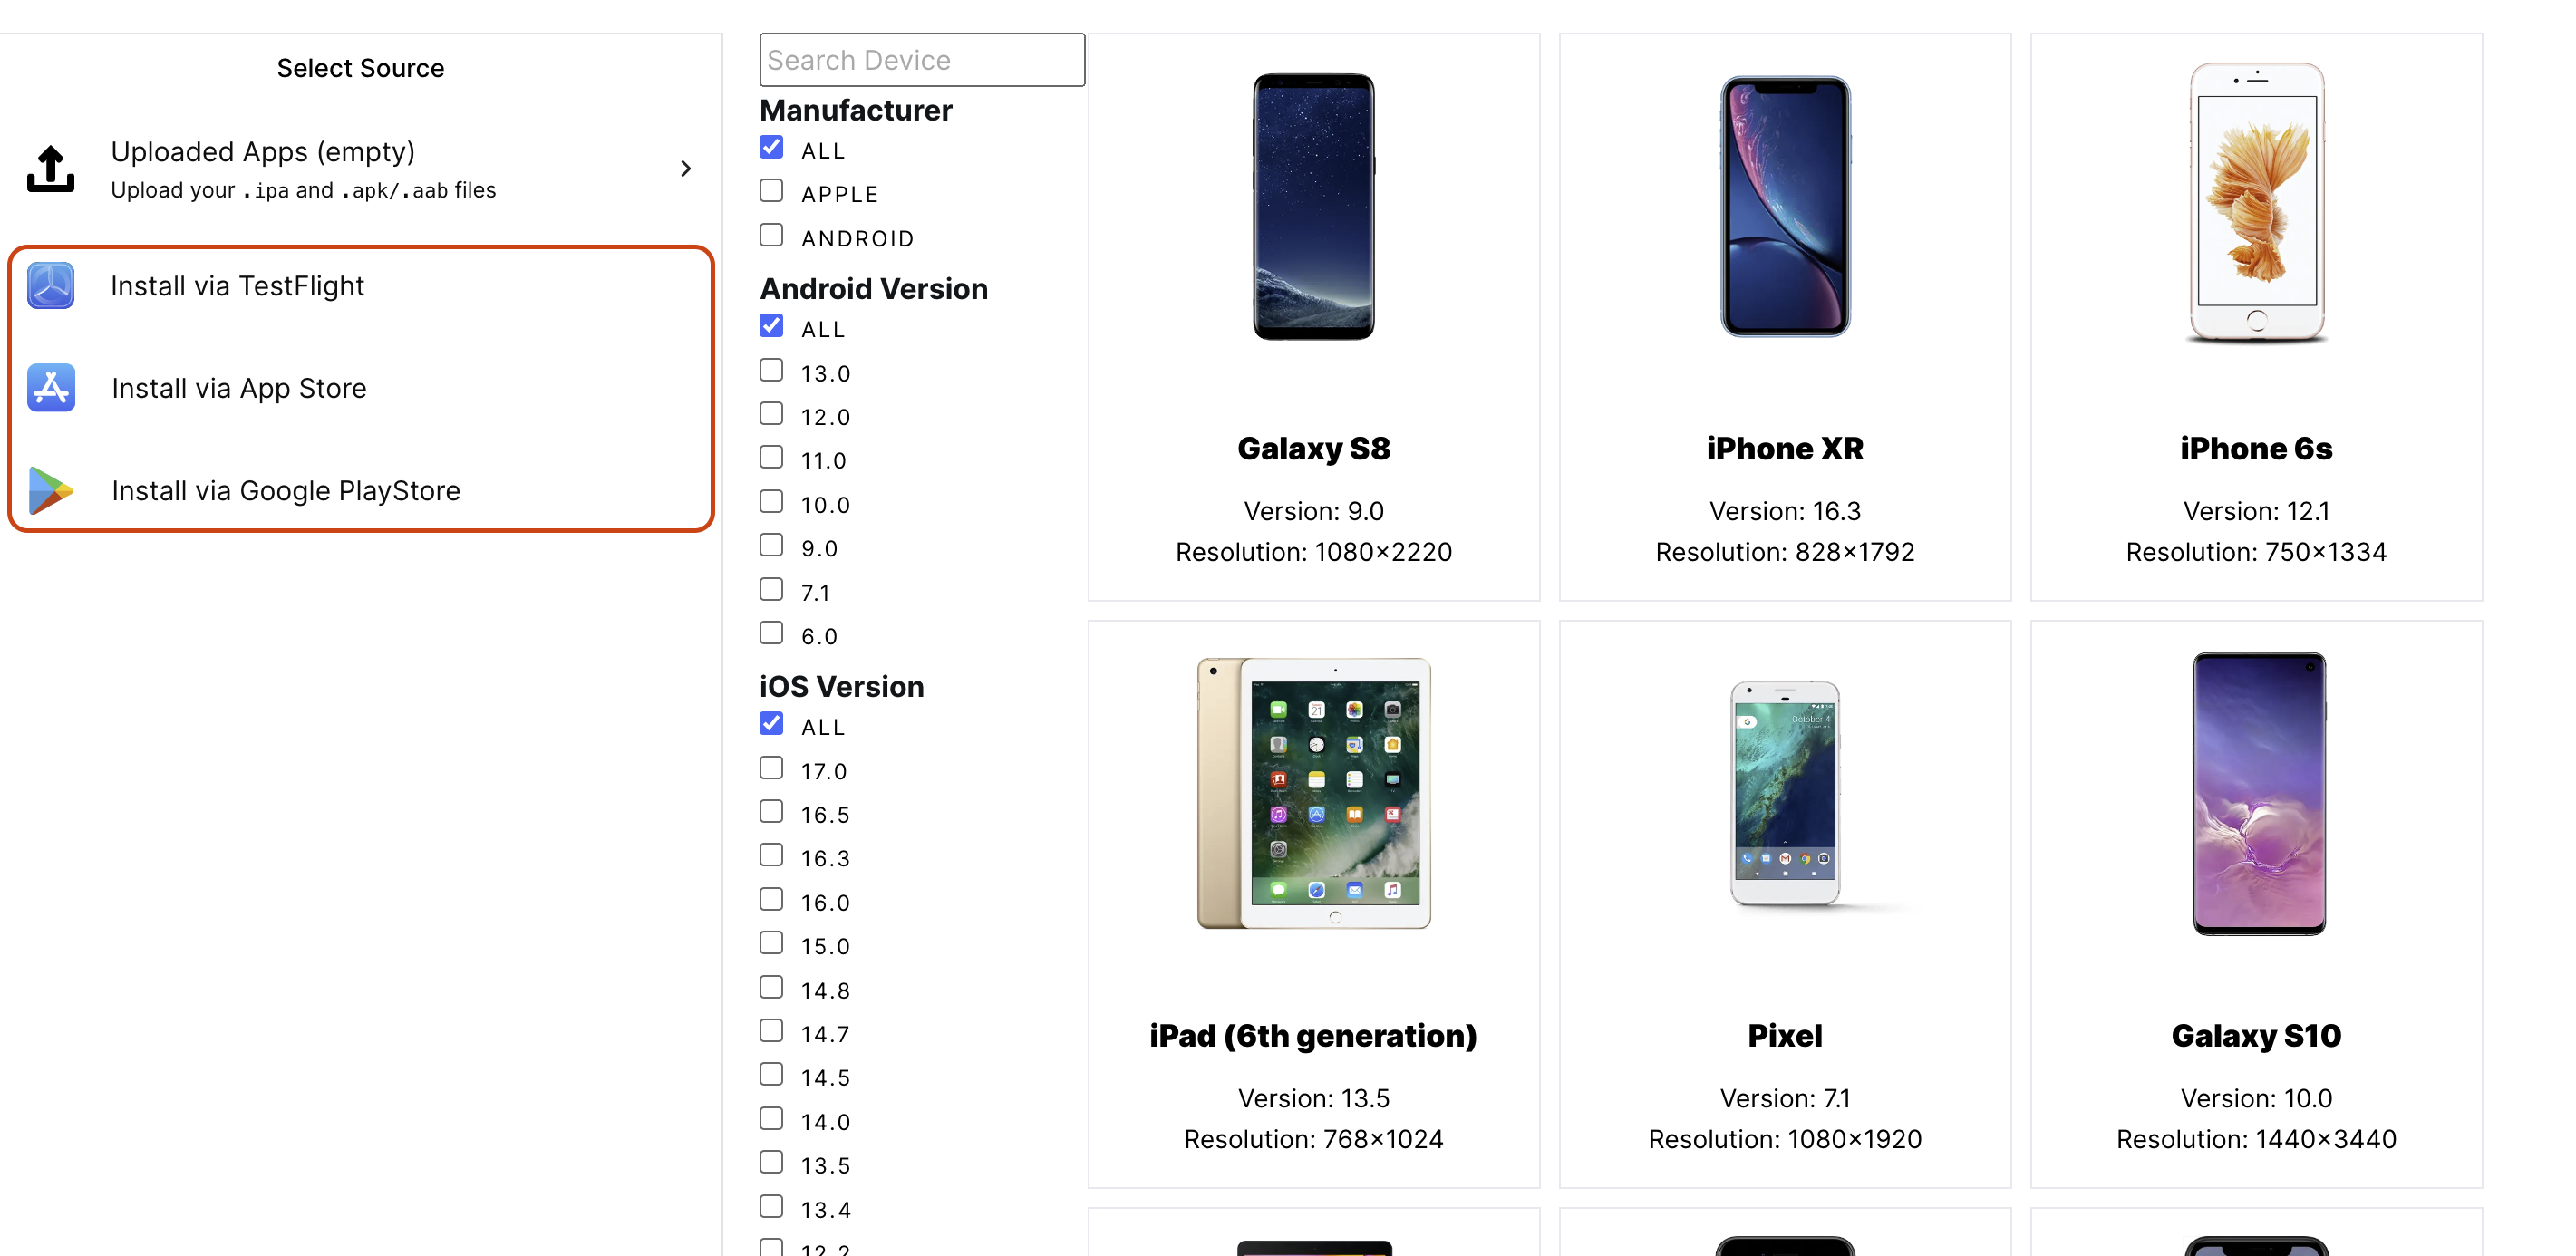
You’ll start in a dashboard with a select few devices to choose from.
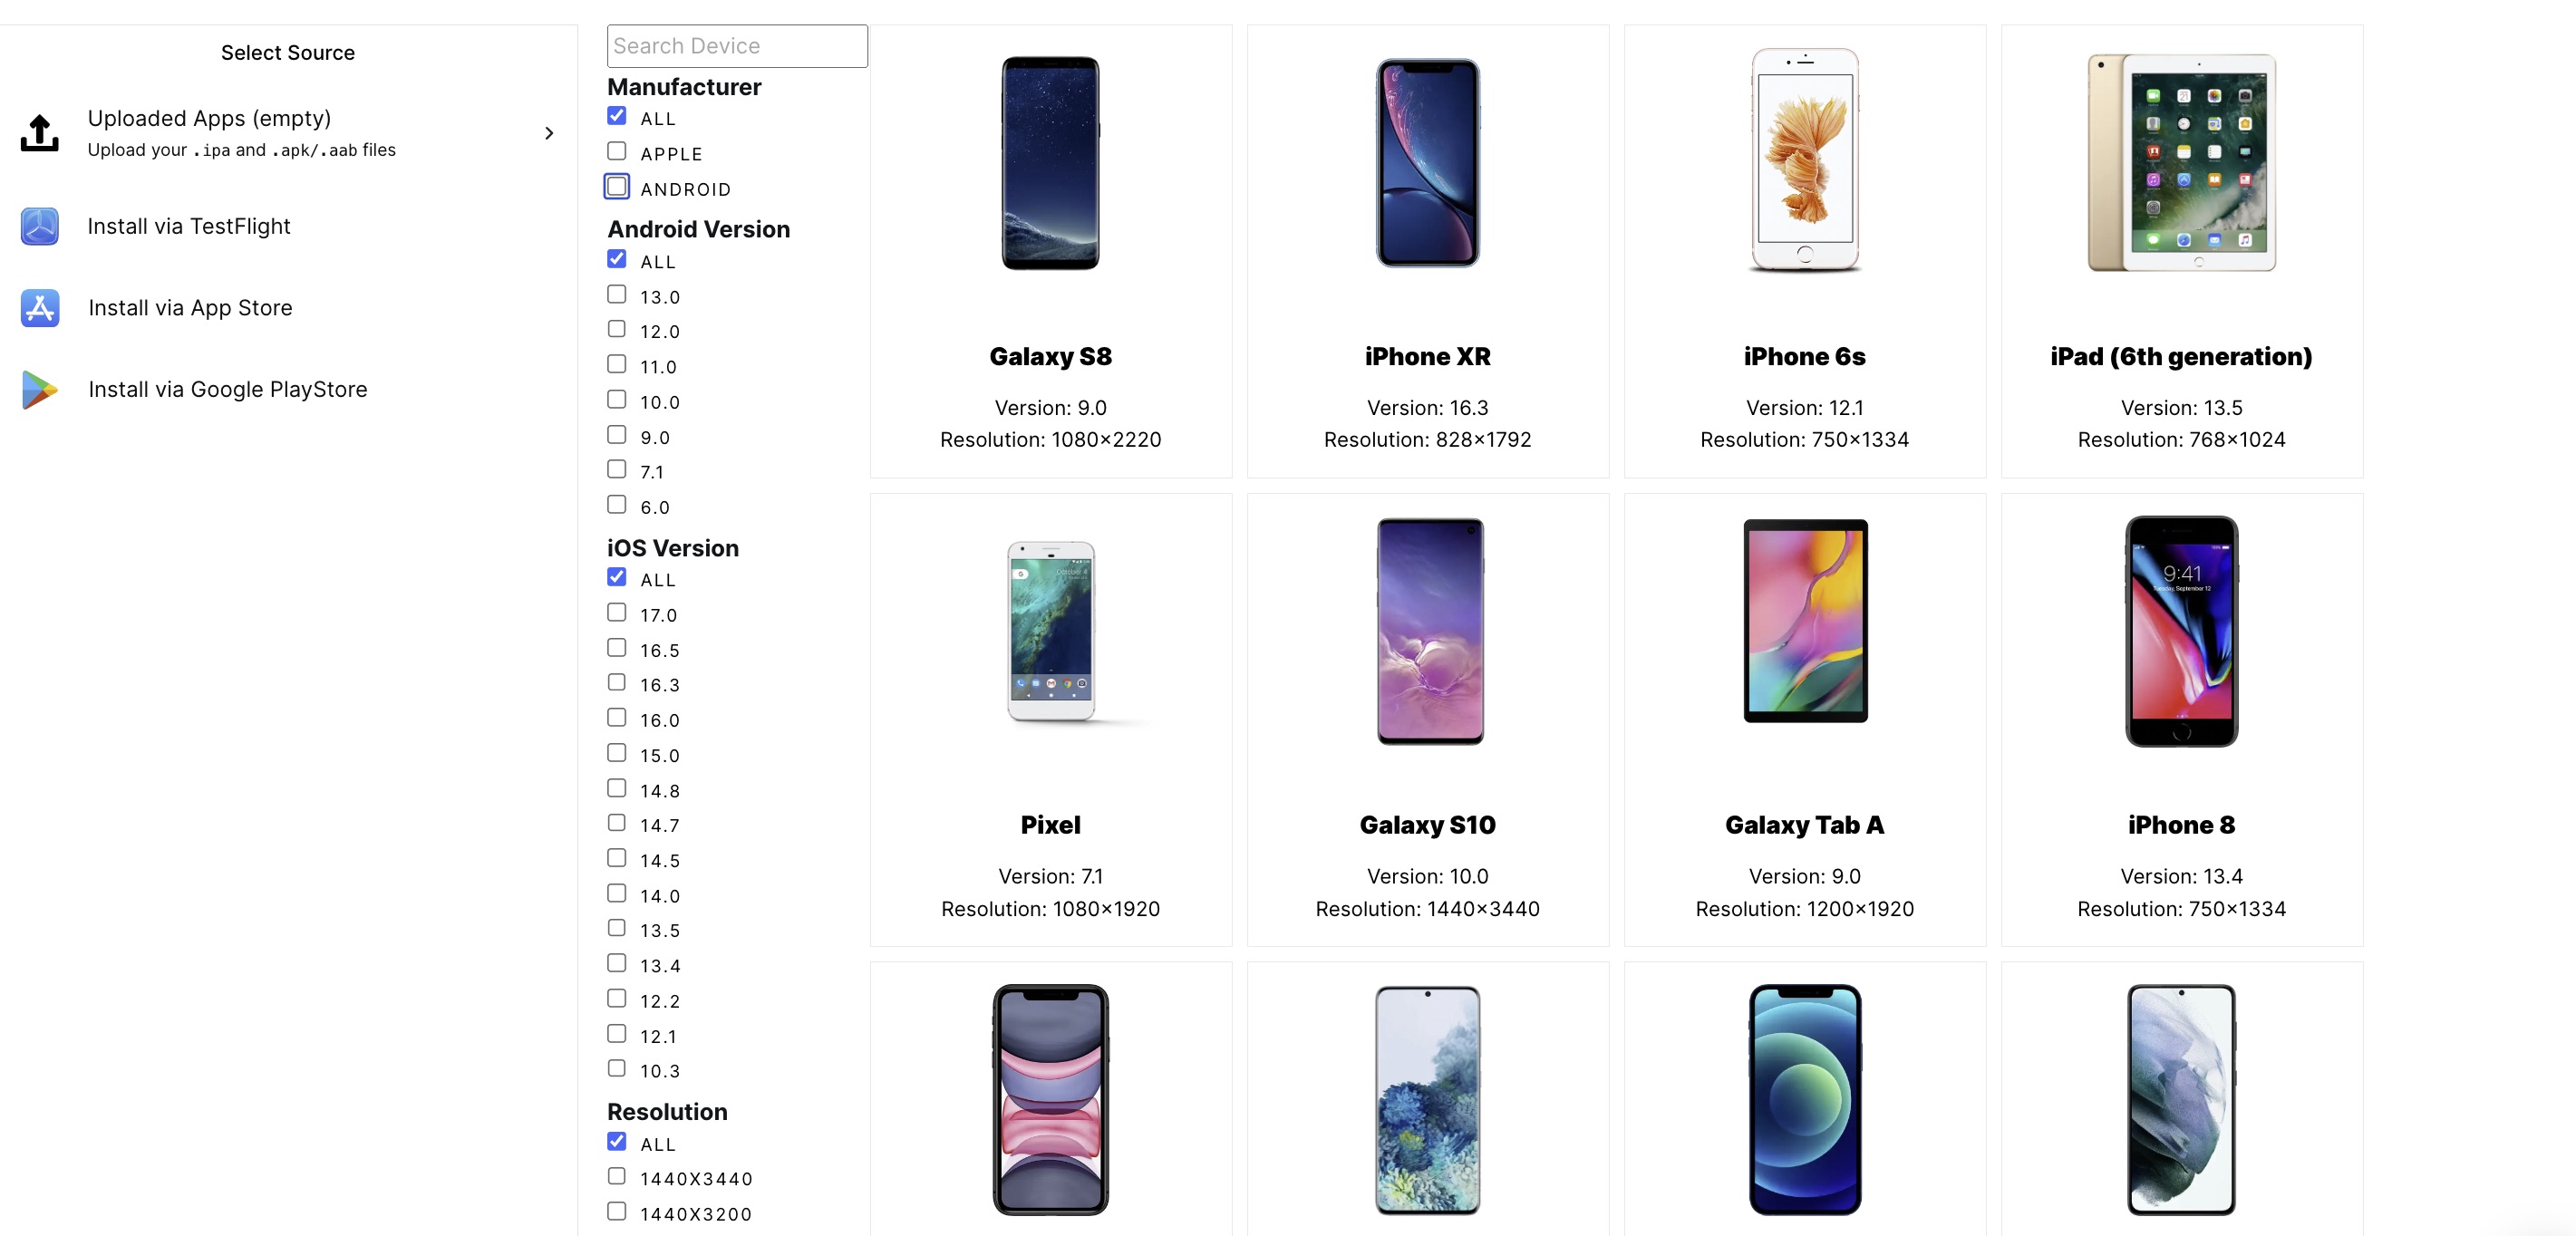
To start testing an app, visit the left sidebar to upload the file you want to test.
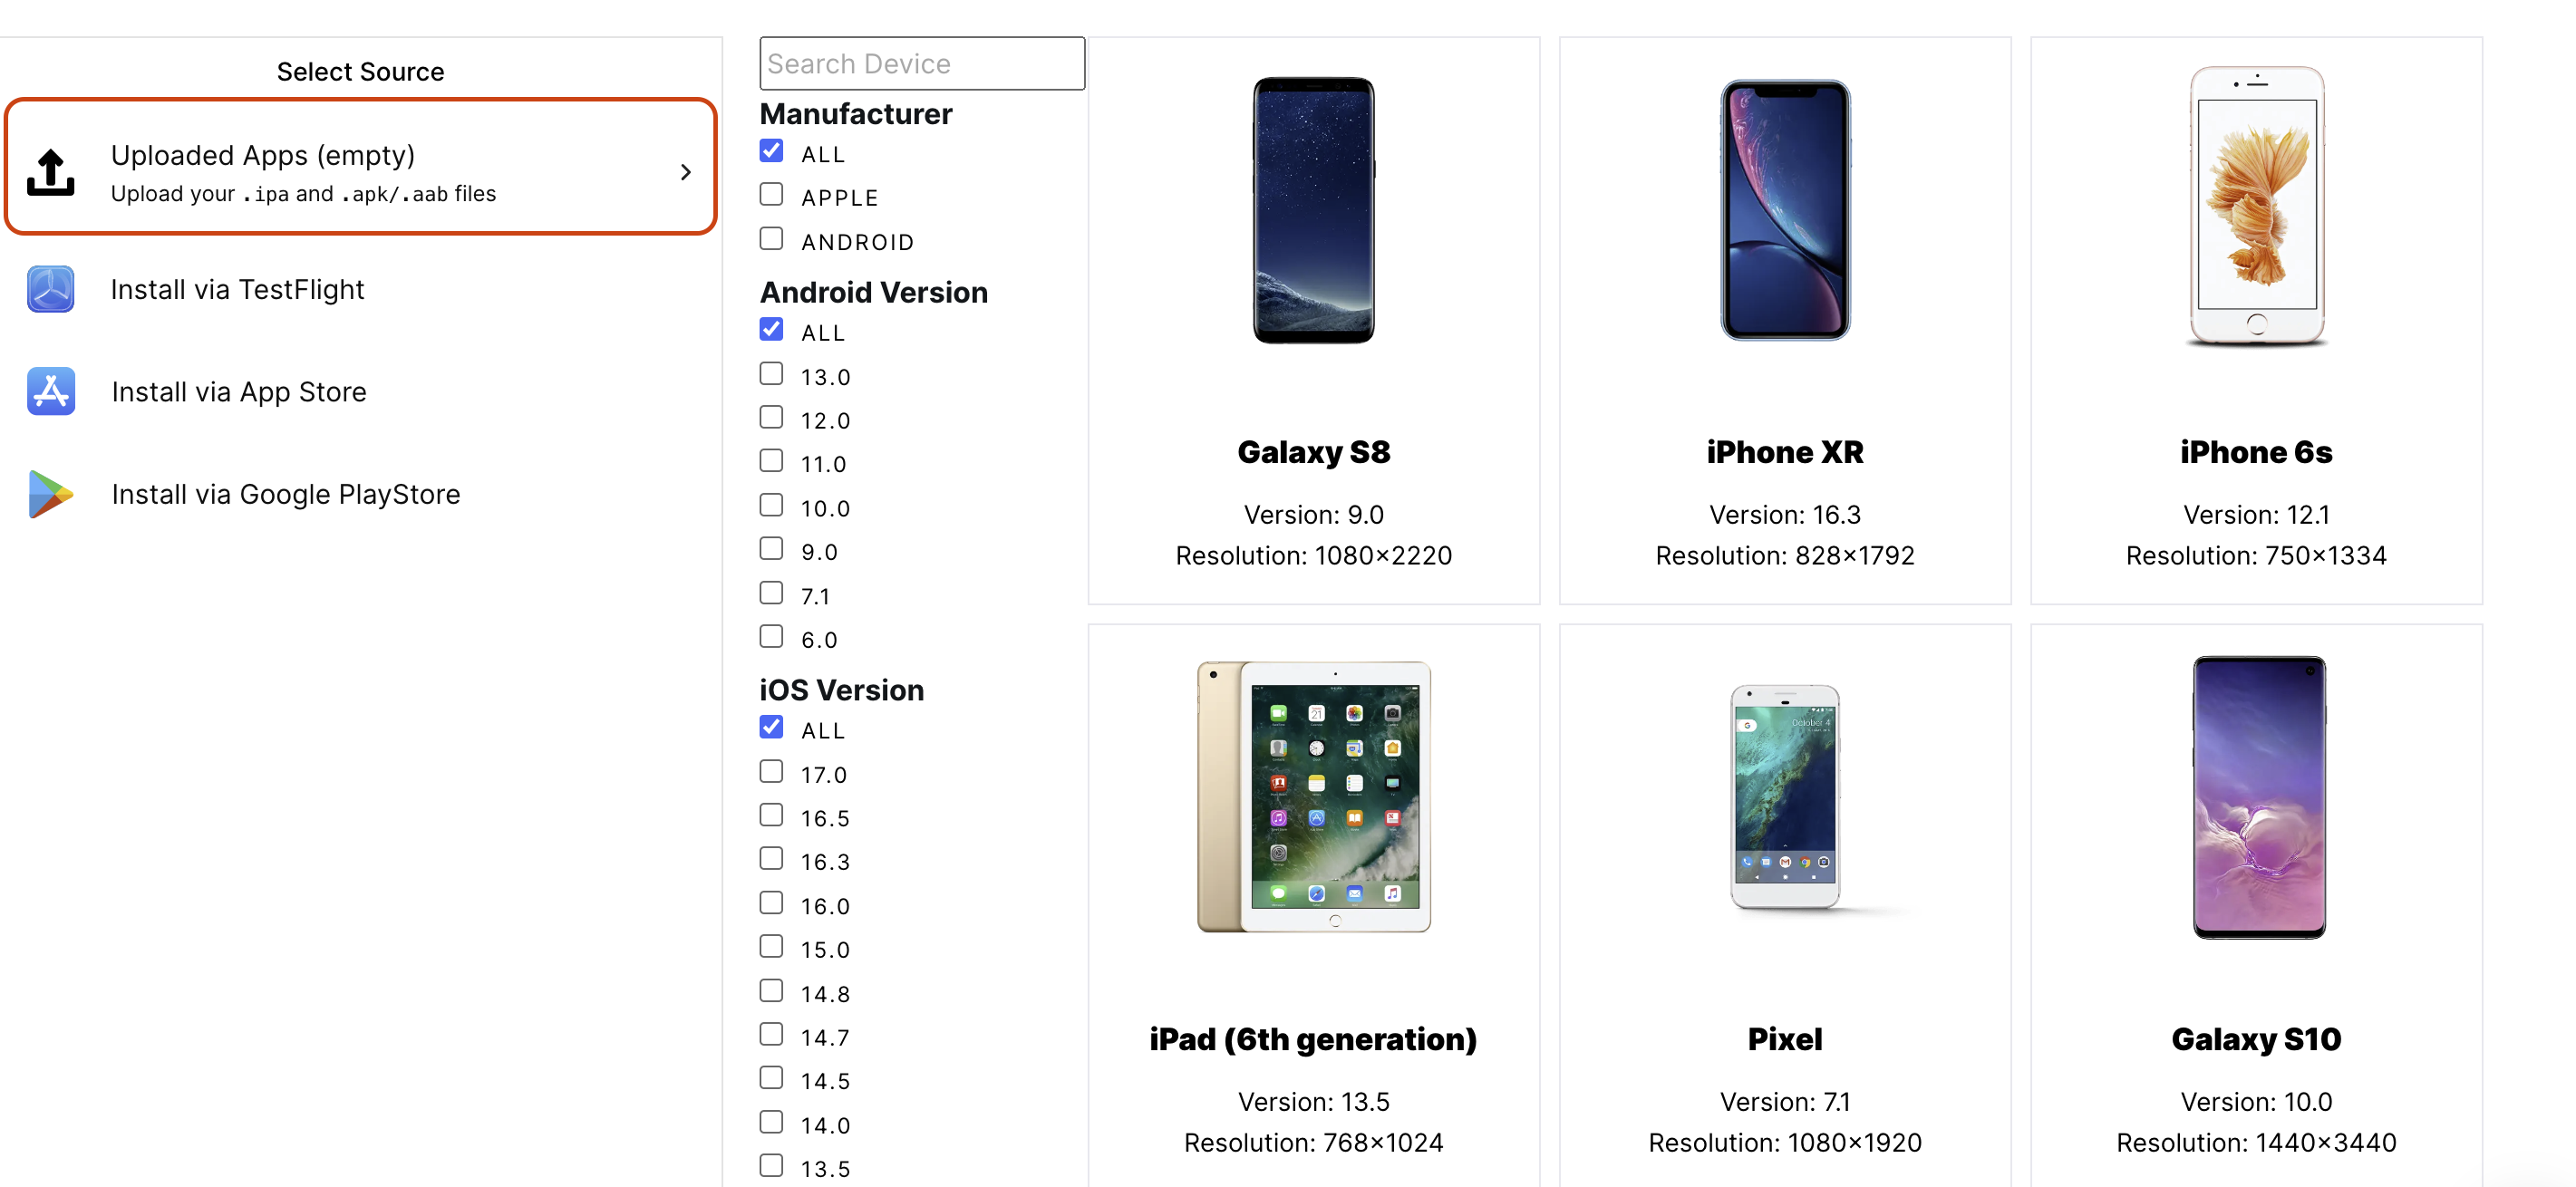
The items shown are categorized by devices that use the Apple App Store and the Google Play Store.
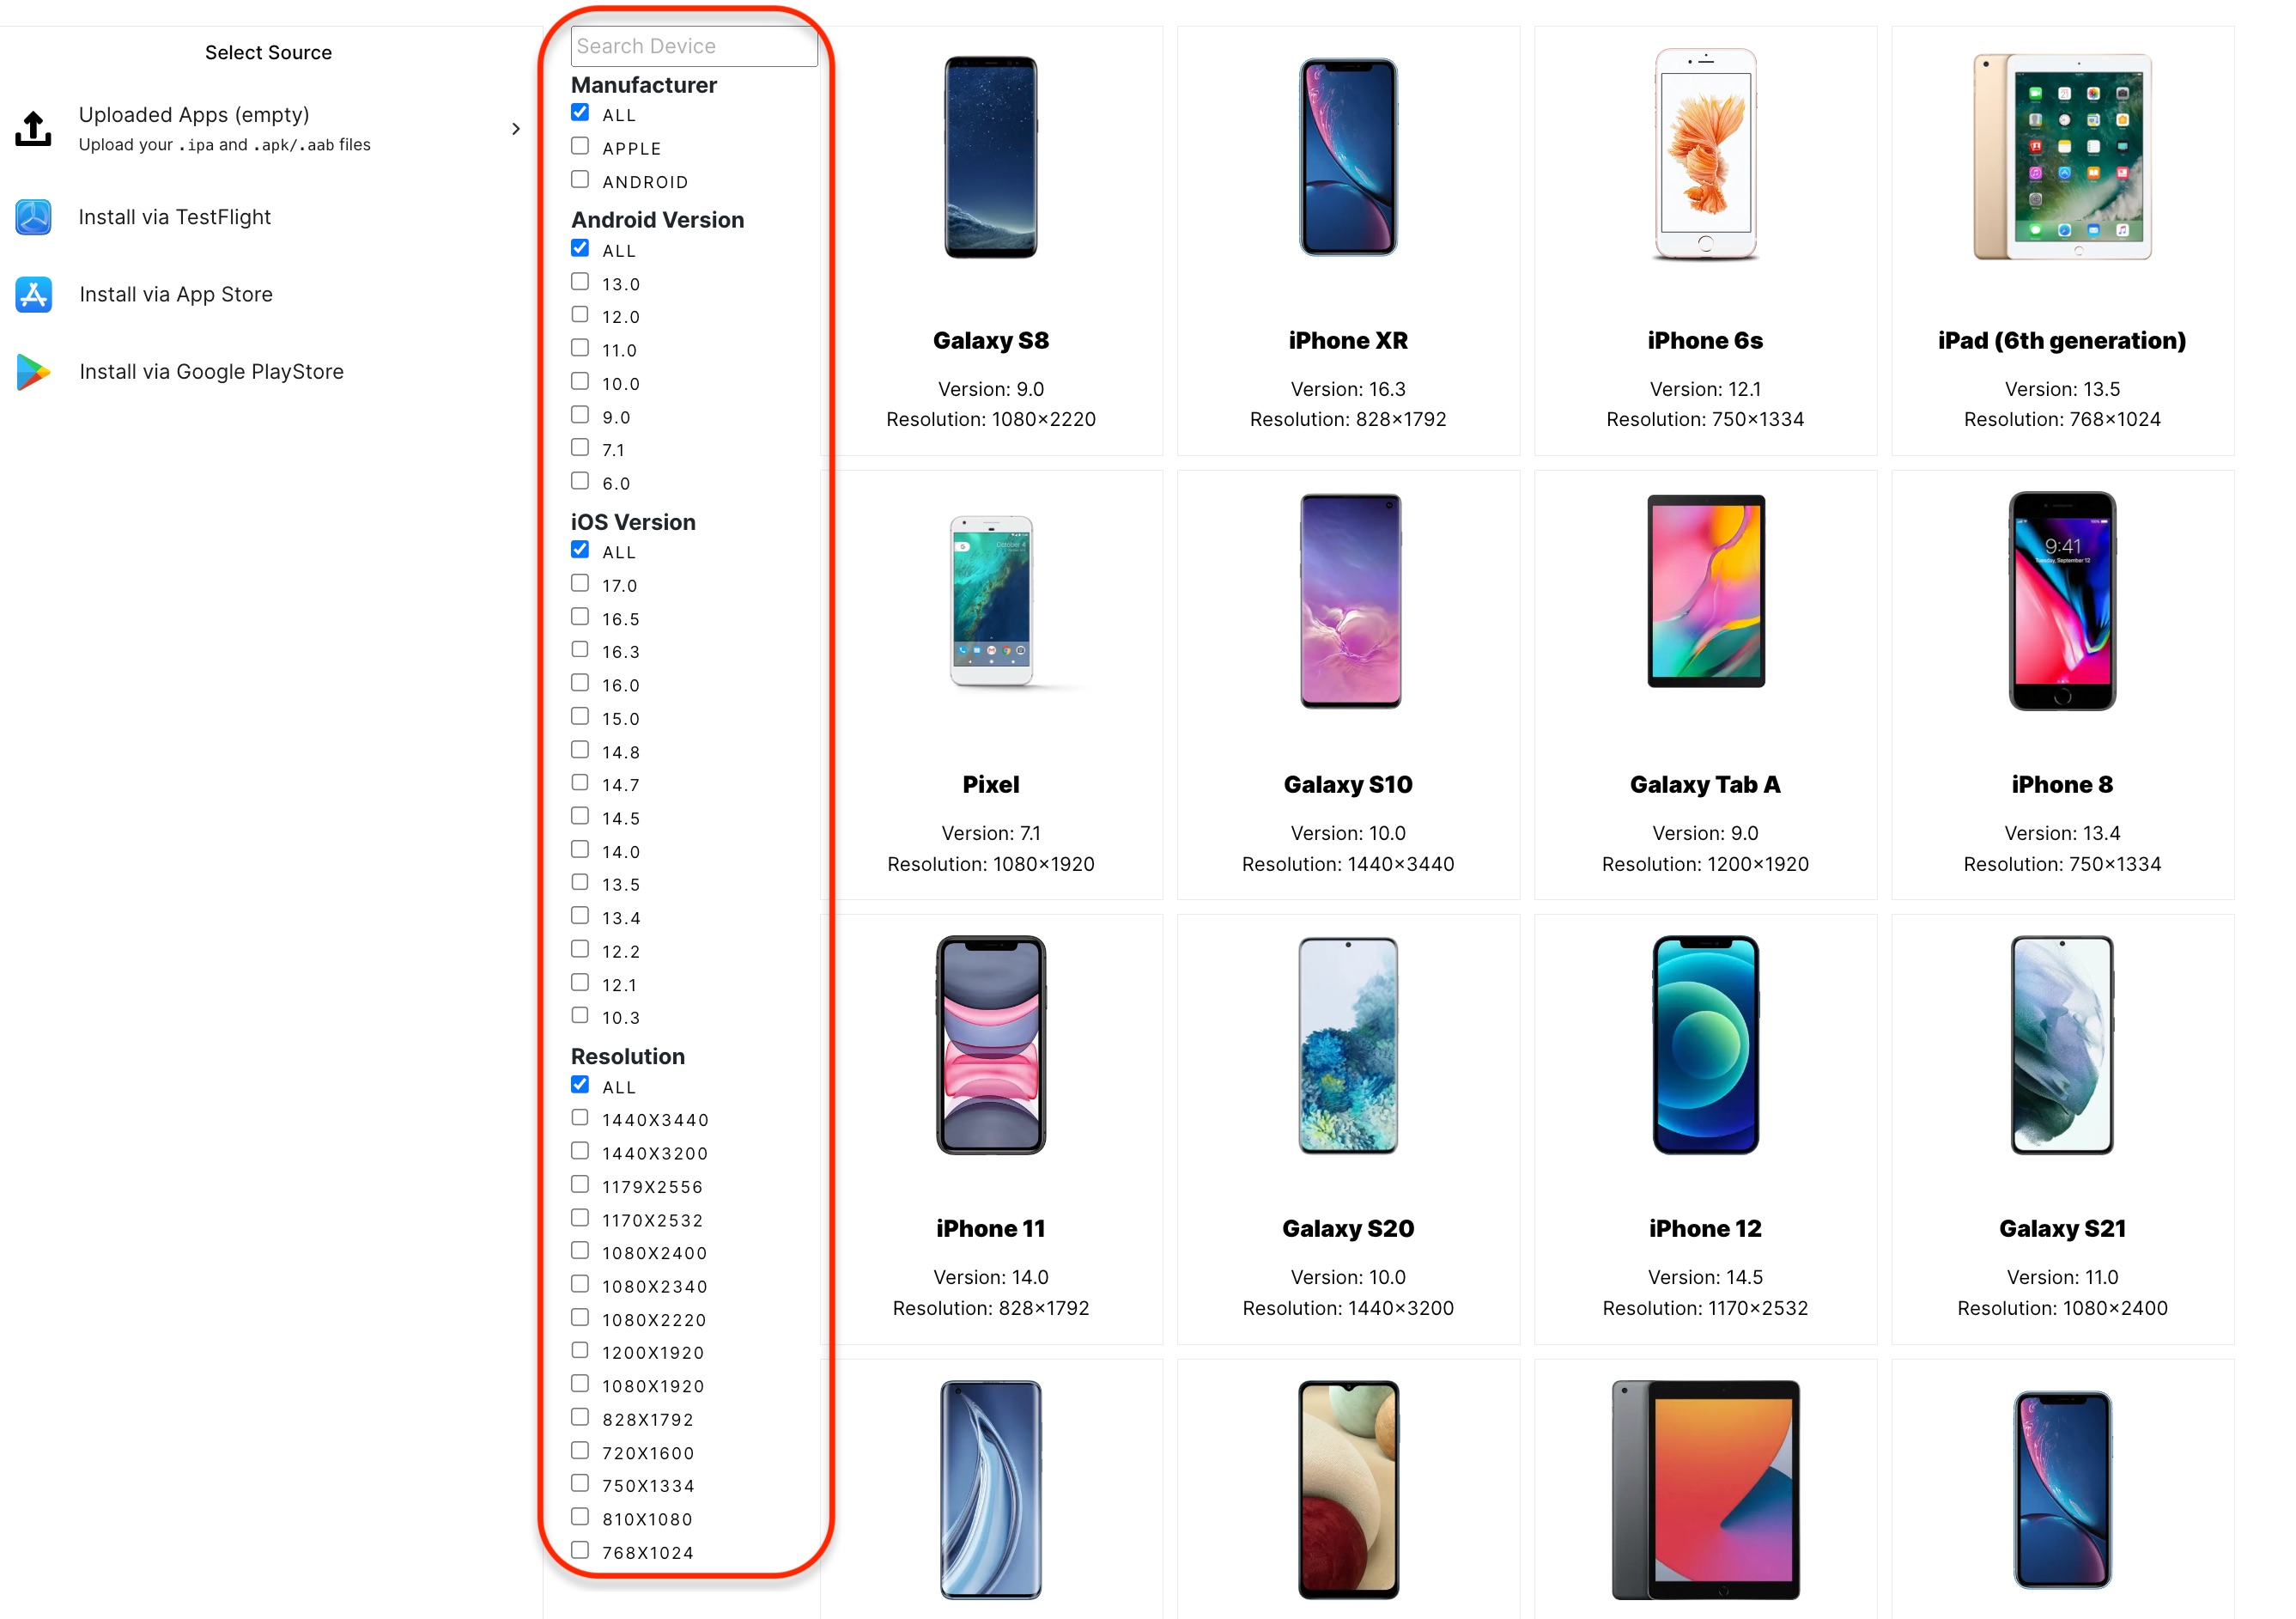
In the left sidebar, you can also filter your options by selecting your manufacturer, operating system version, and resolution. You can also search for a device.
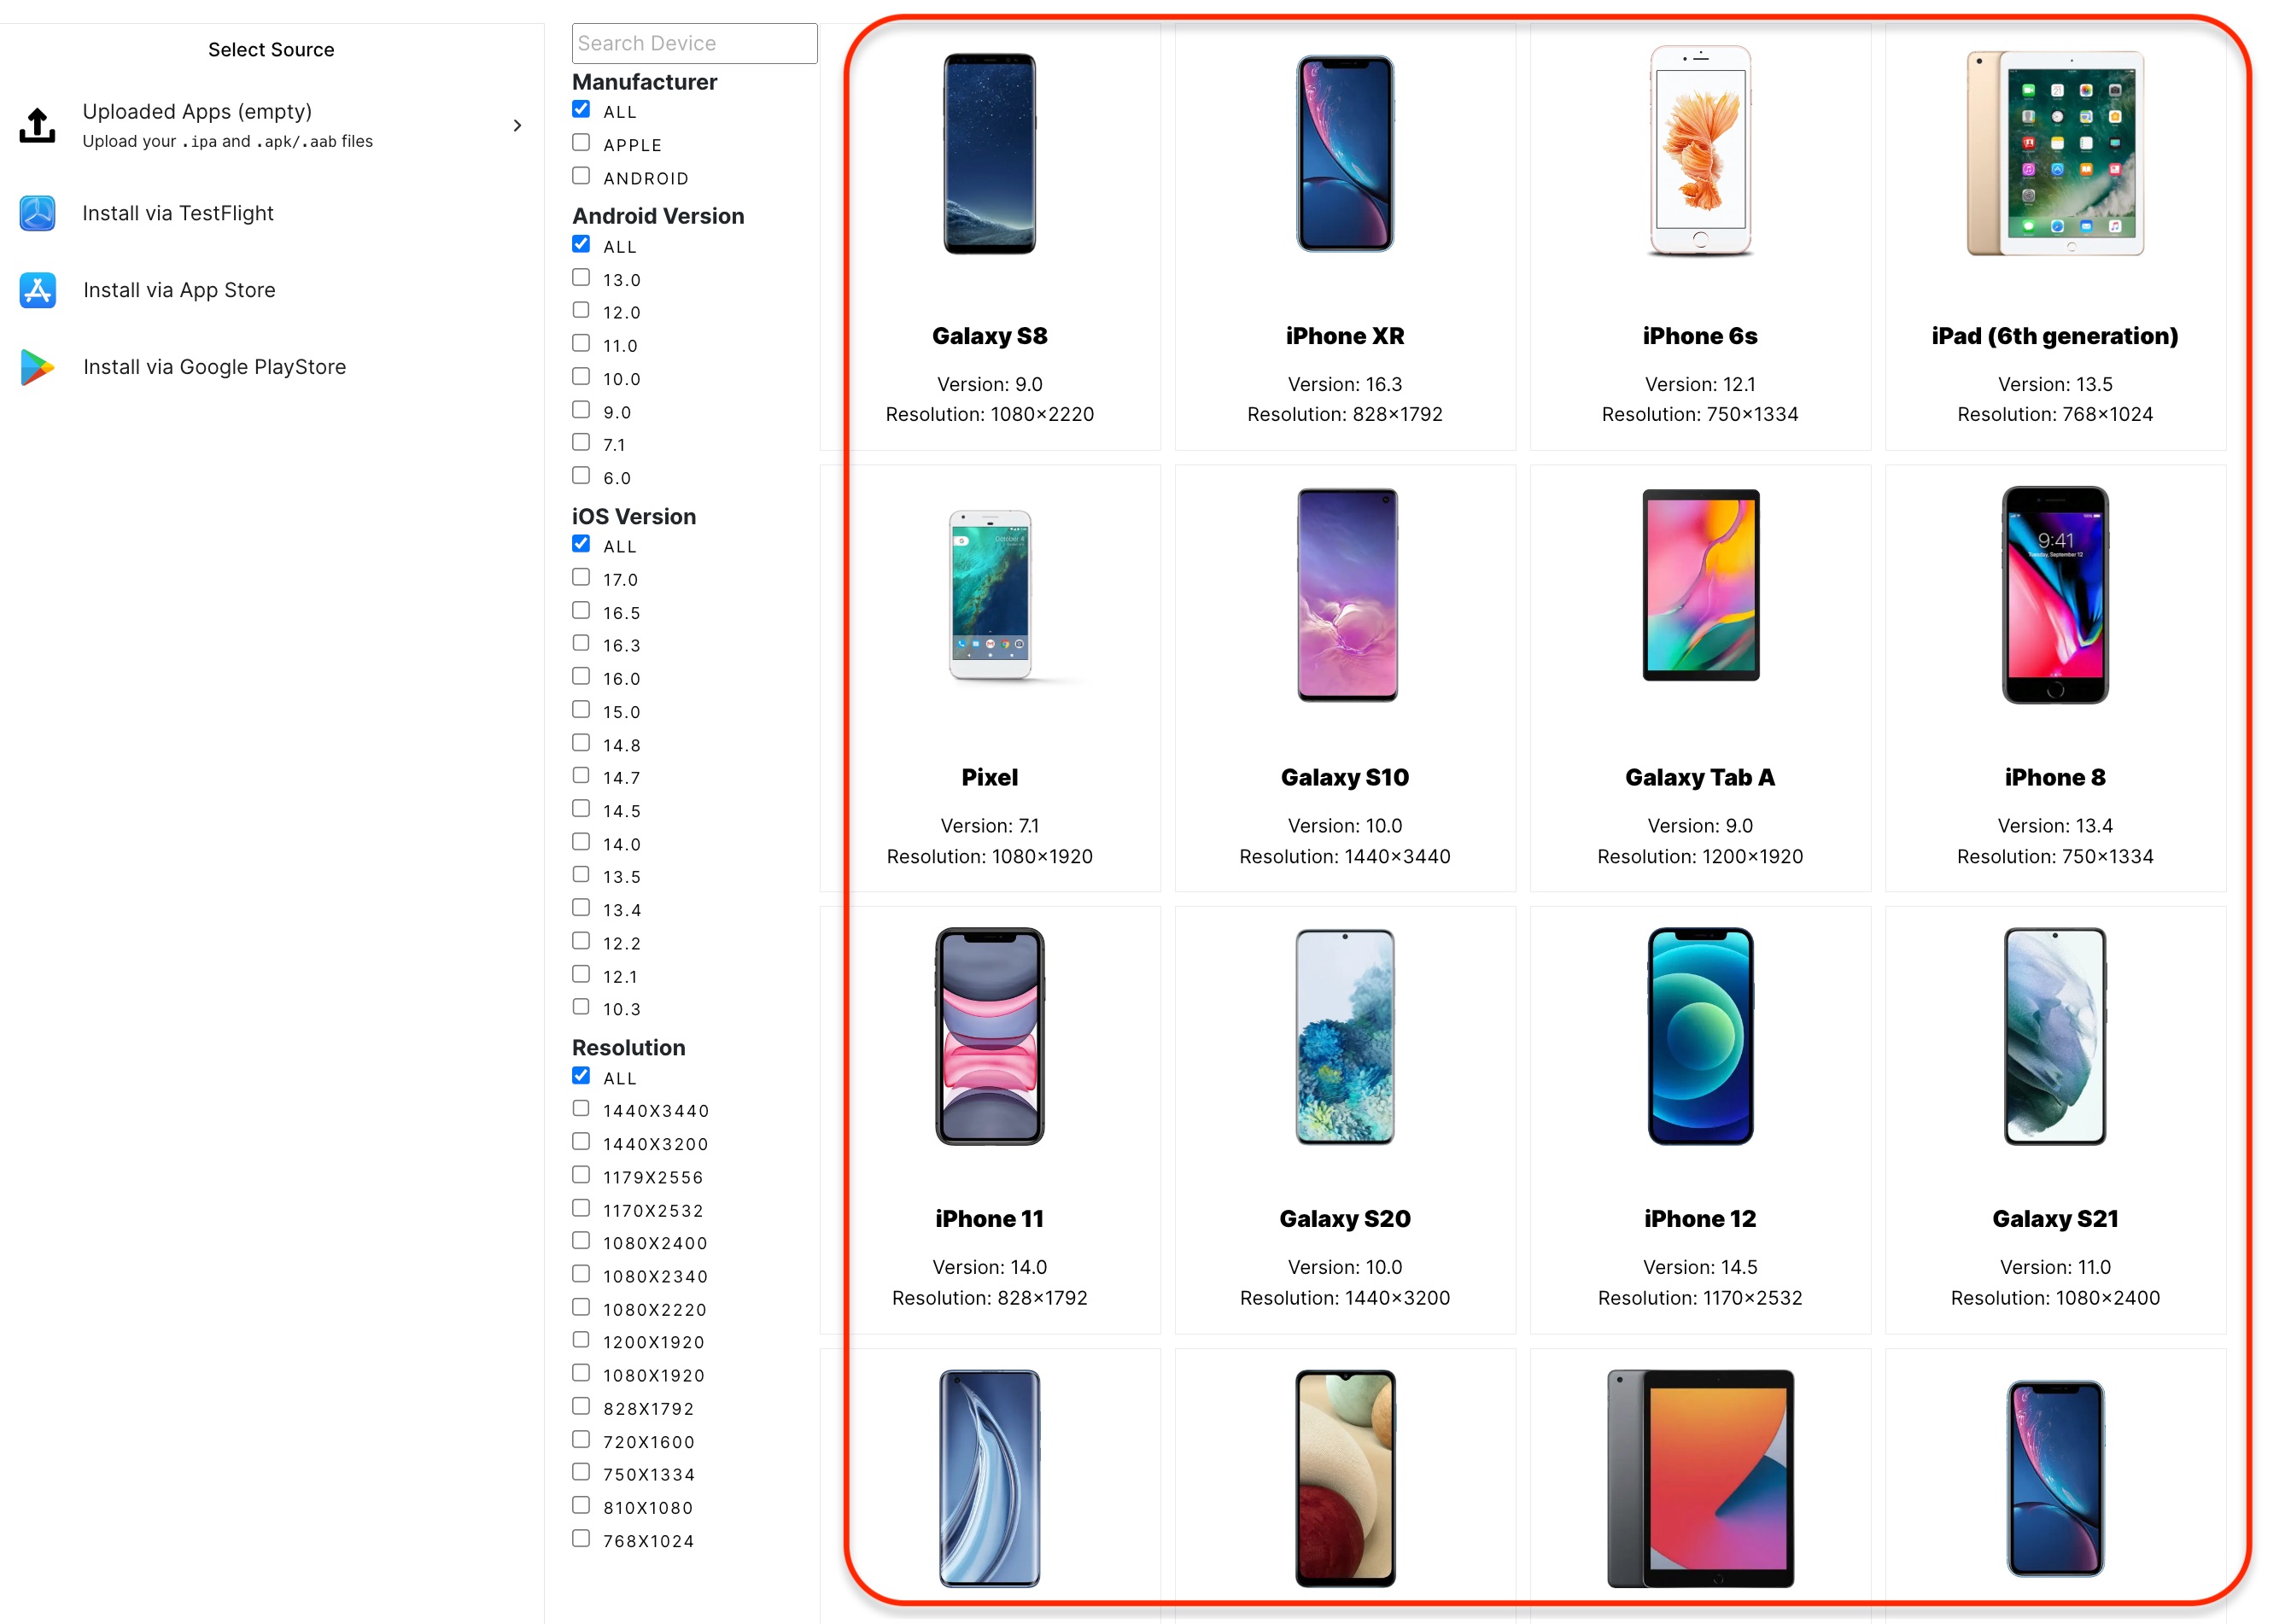
On the right is a catalog of devices with various OS you can test on.
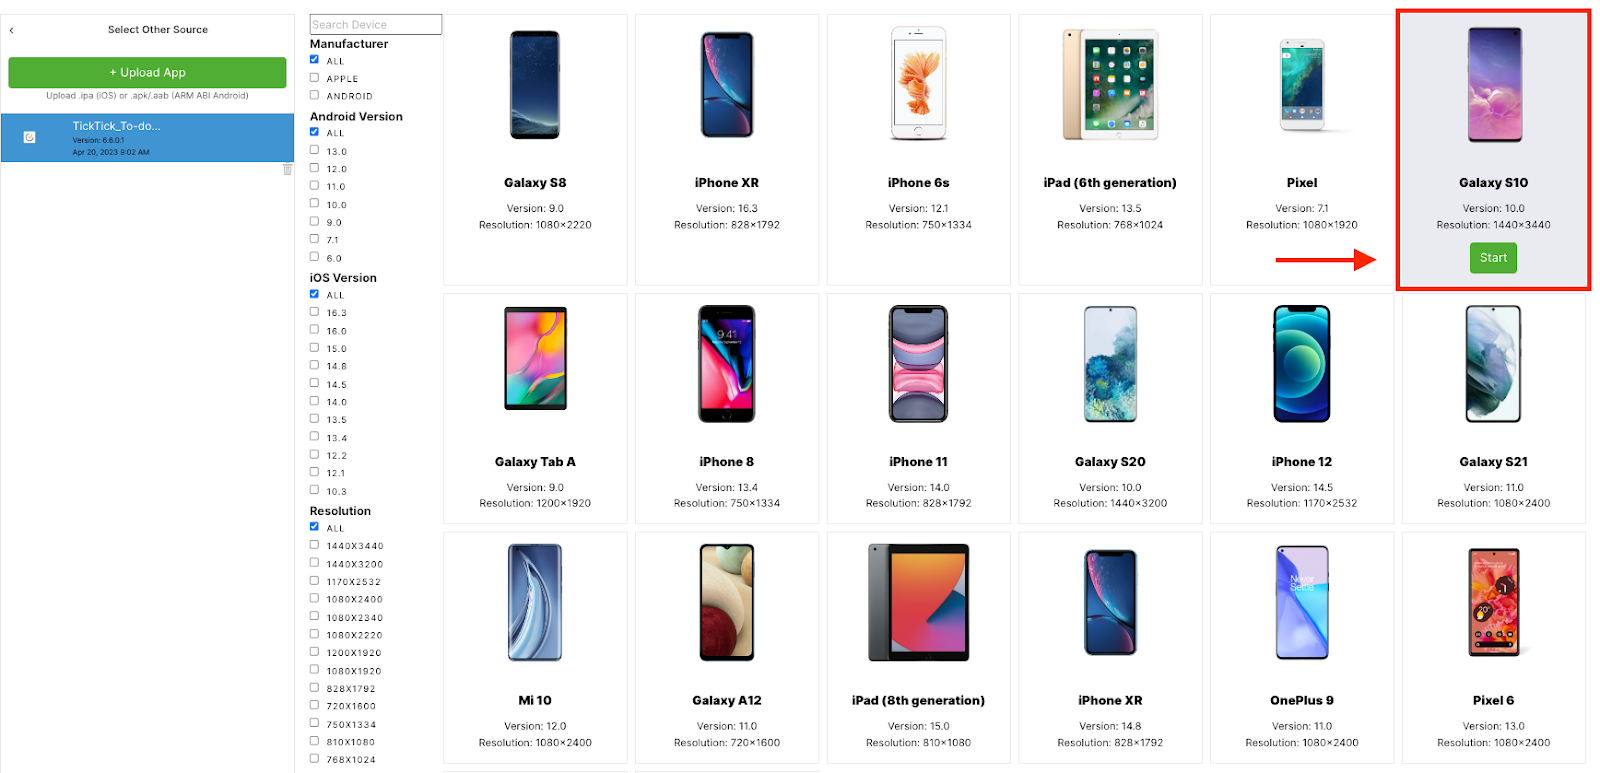
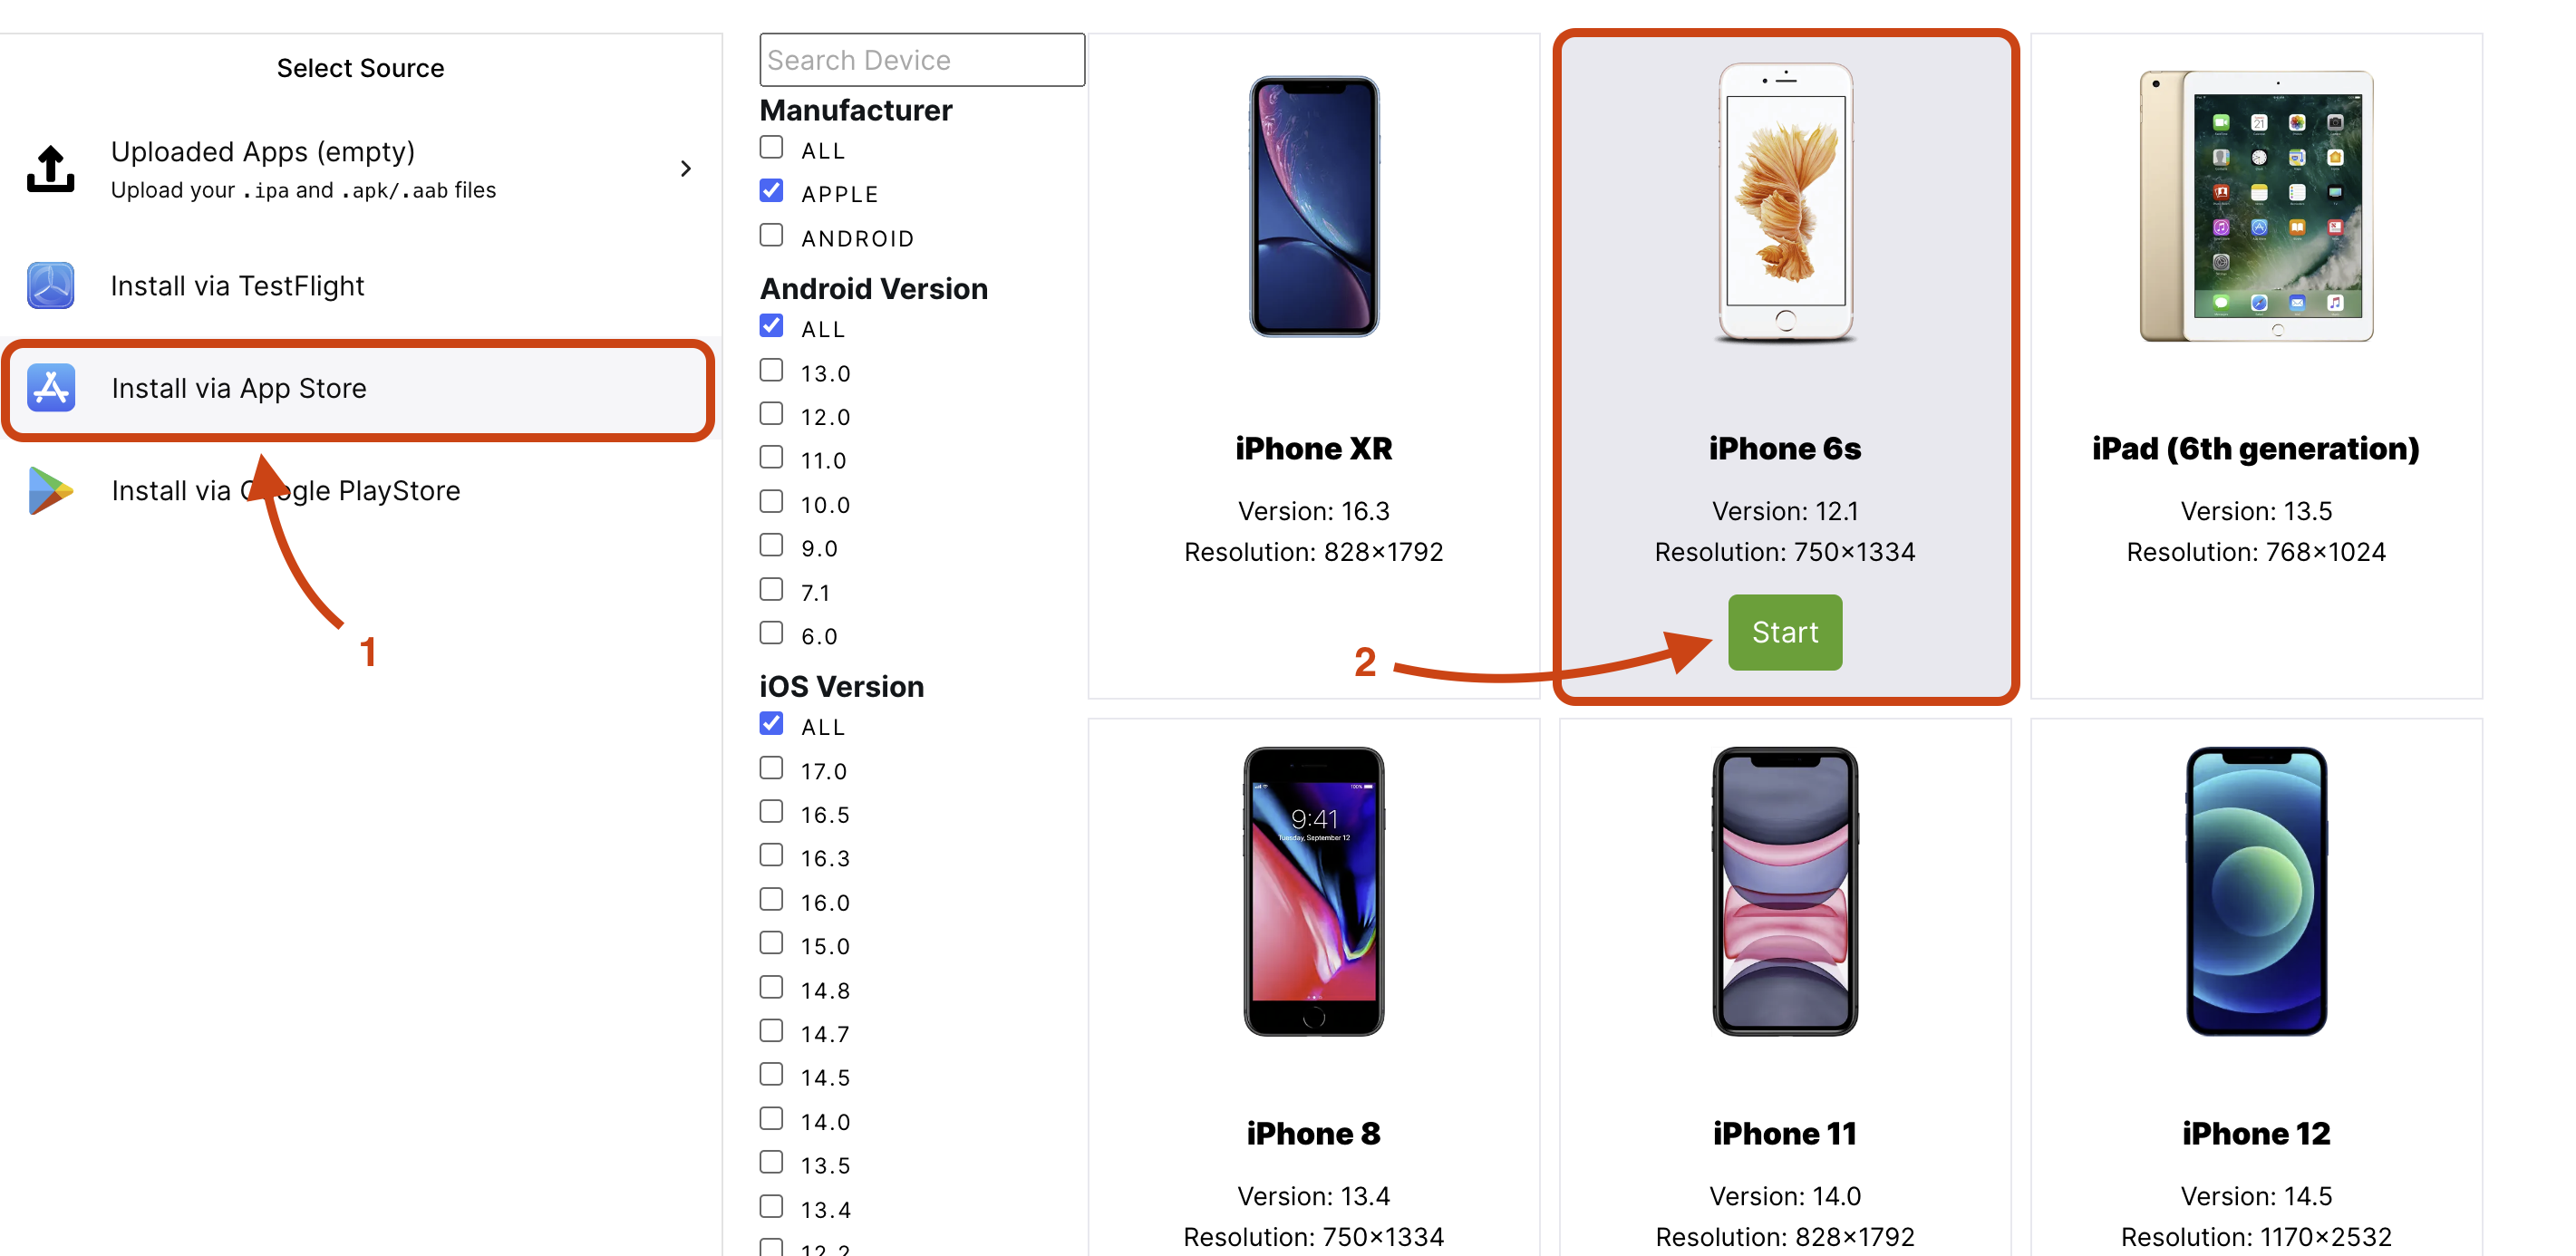
After uploading your file, select your preferred device to test the app and click the green “Start” button.
Once you click “Start,” you’ll see a real-time view of the app on the device.
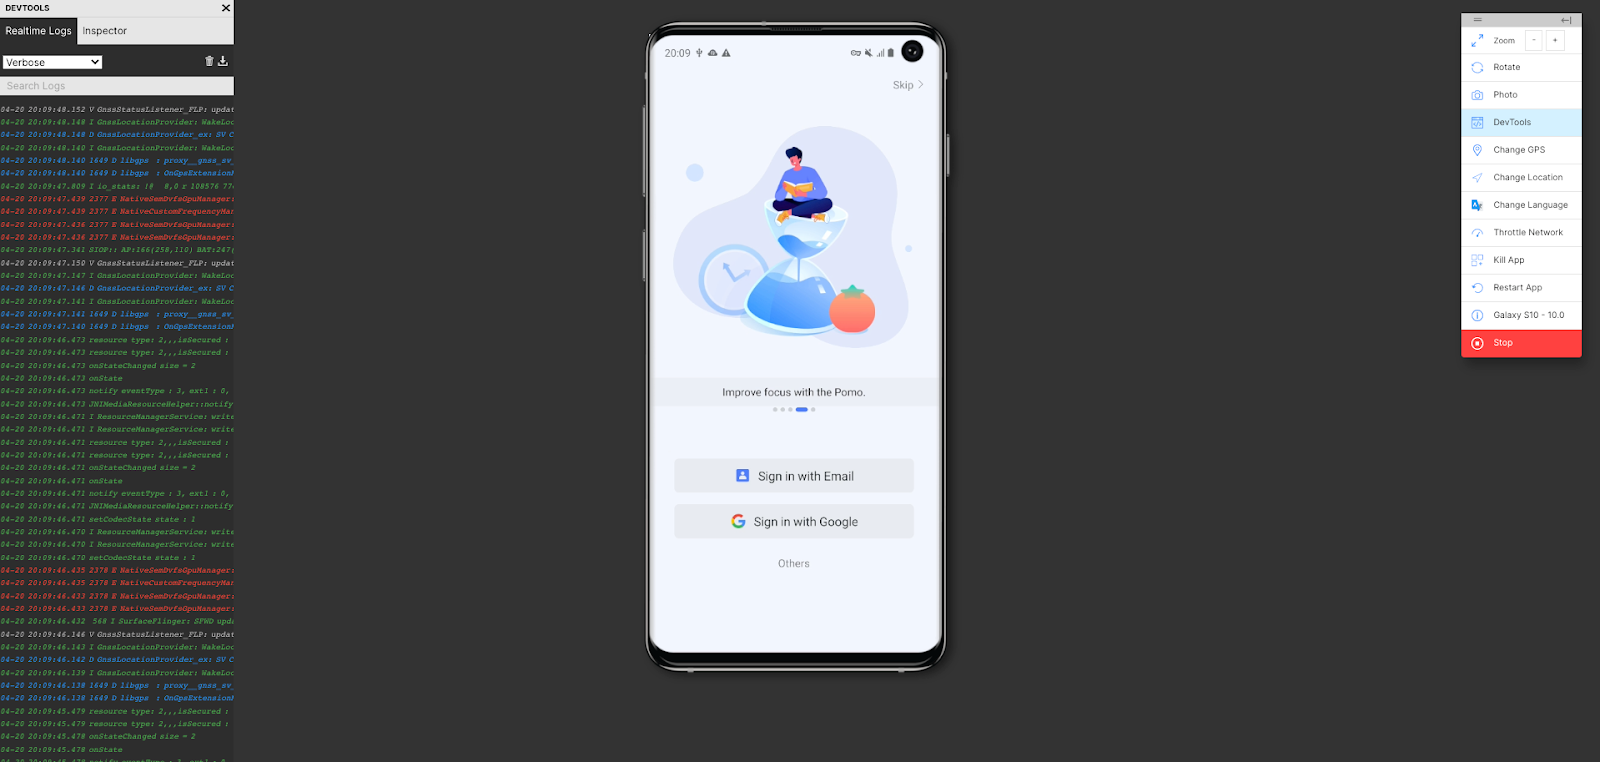
Since the on-screen device allows you to work in a physical device remotely, you can interact with the app, scroll up and down, and swipe to other pages just like on a physical device.
The logs are visible at all times, but if there is a crash, error, or warning, it will appear in the left sidebar where real-time logs appear.
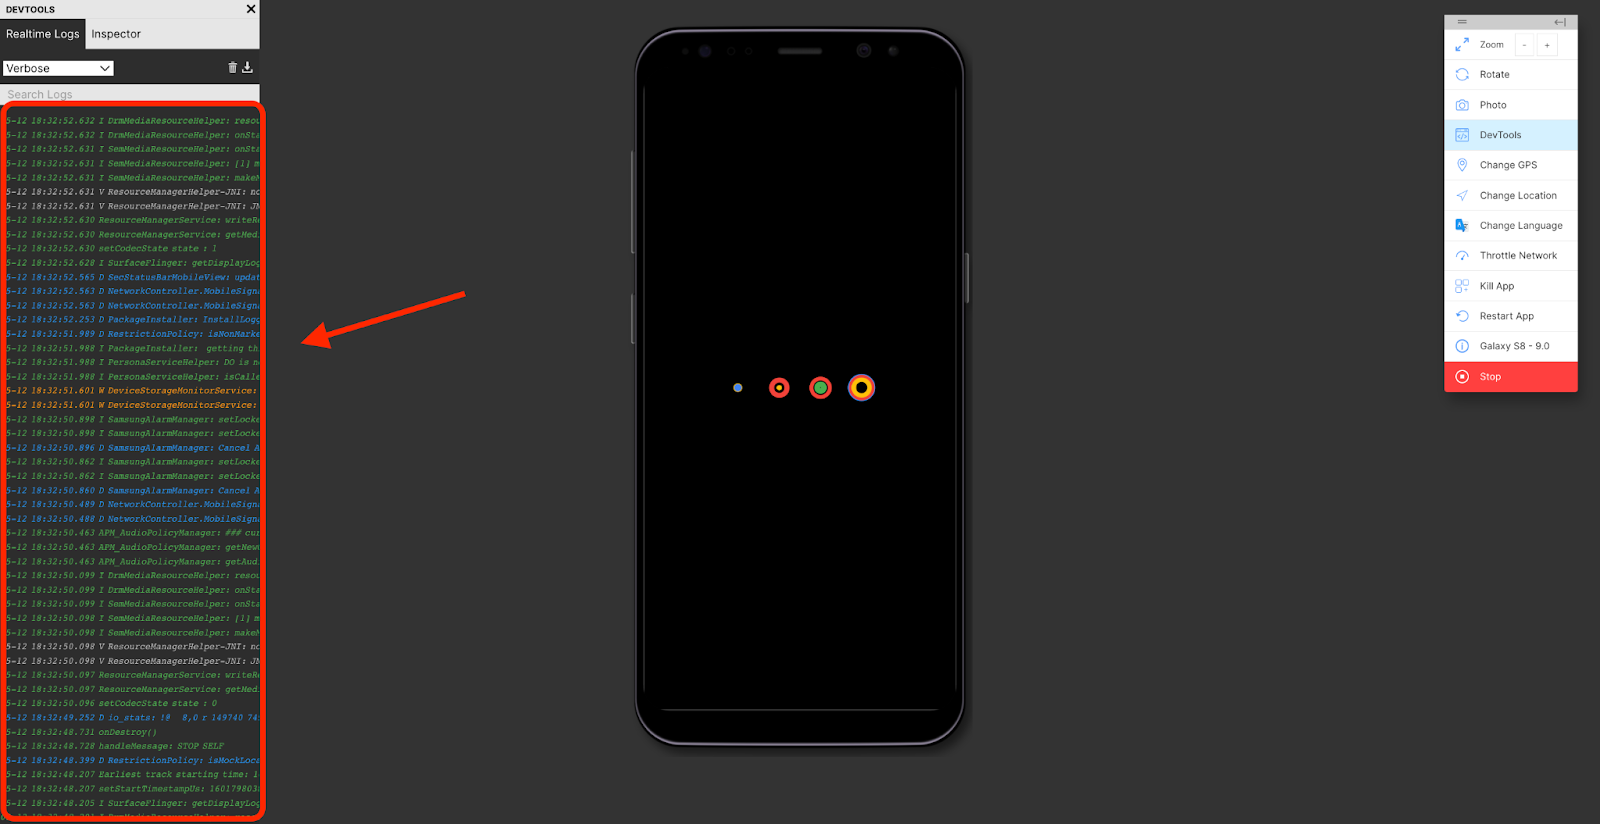
In the right toolbar, you can access DevTools and complete actions like zooming in and out, rotating the screen, killing or stopping the app, or throttling the network.
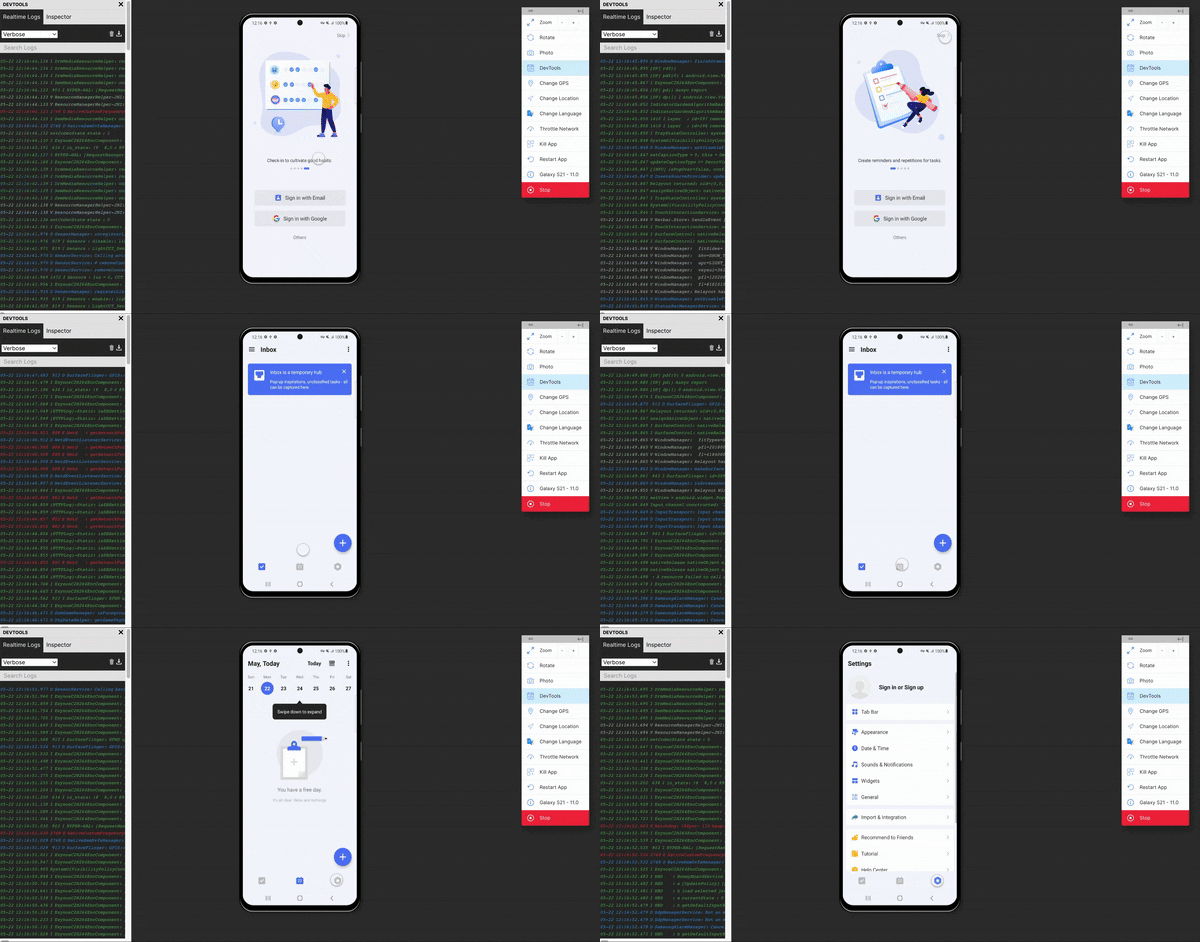
Now that your app is uploaded, you will be able to interact with it like a normal app. You can scroll and click on items.
How To Take and Edit a Screenshot
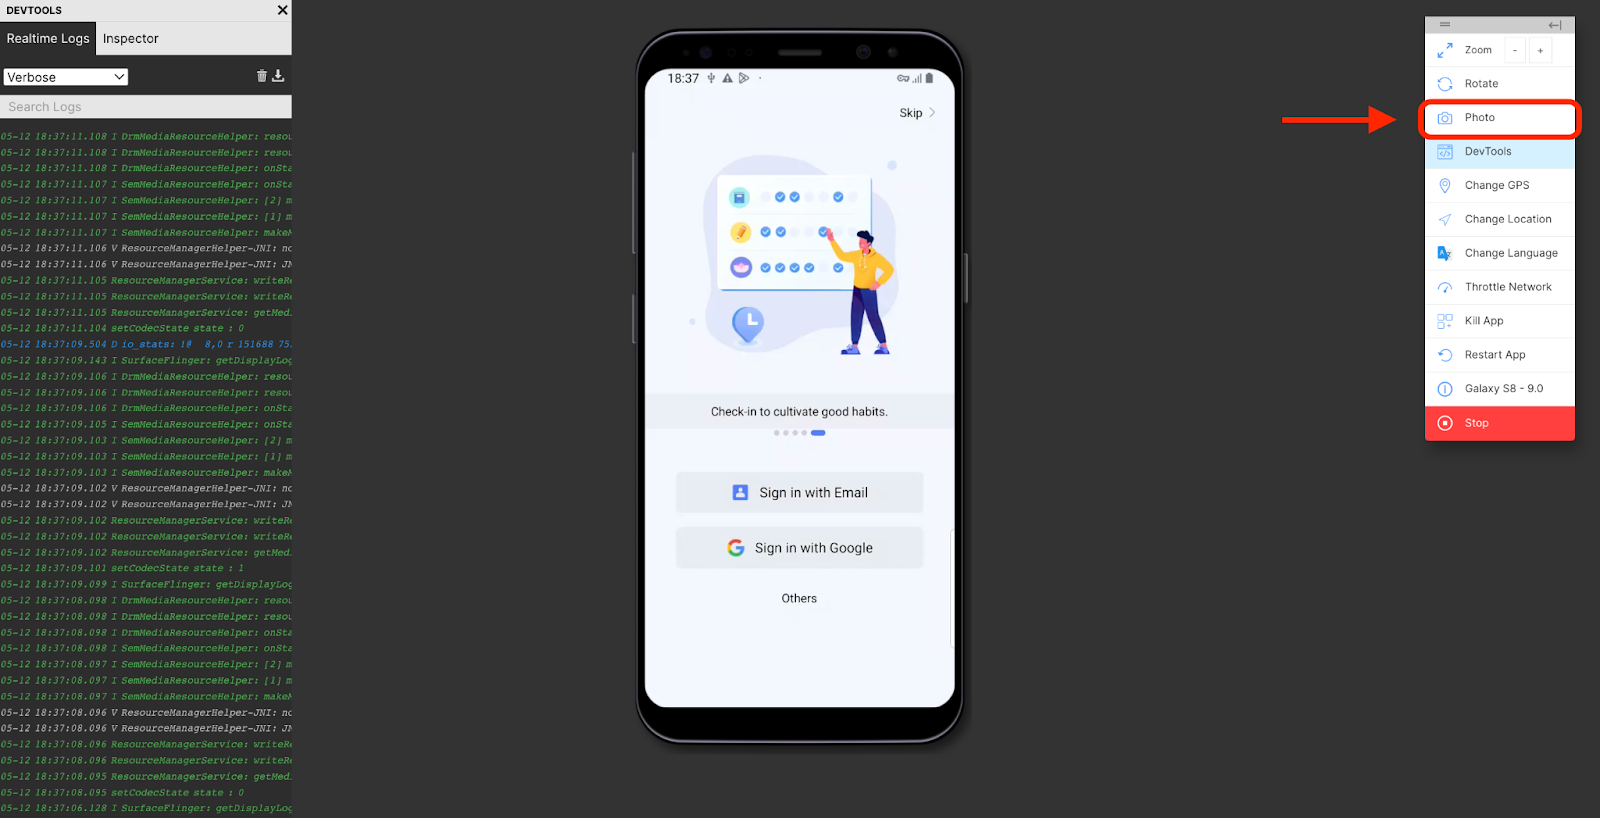
Select the “Photo” tab in the right toolbar.
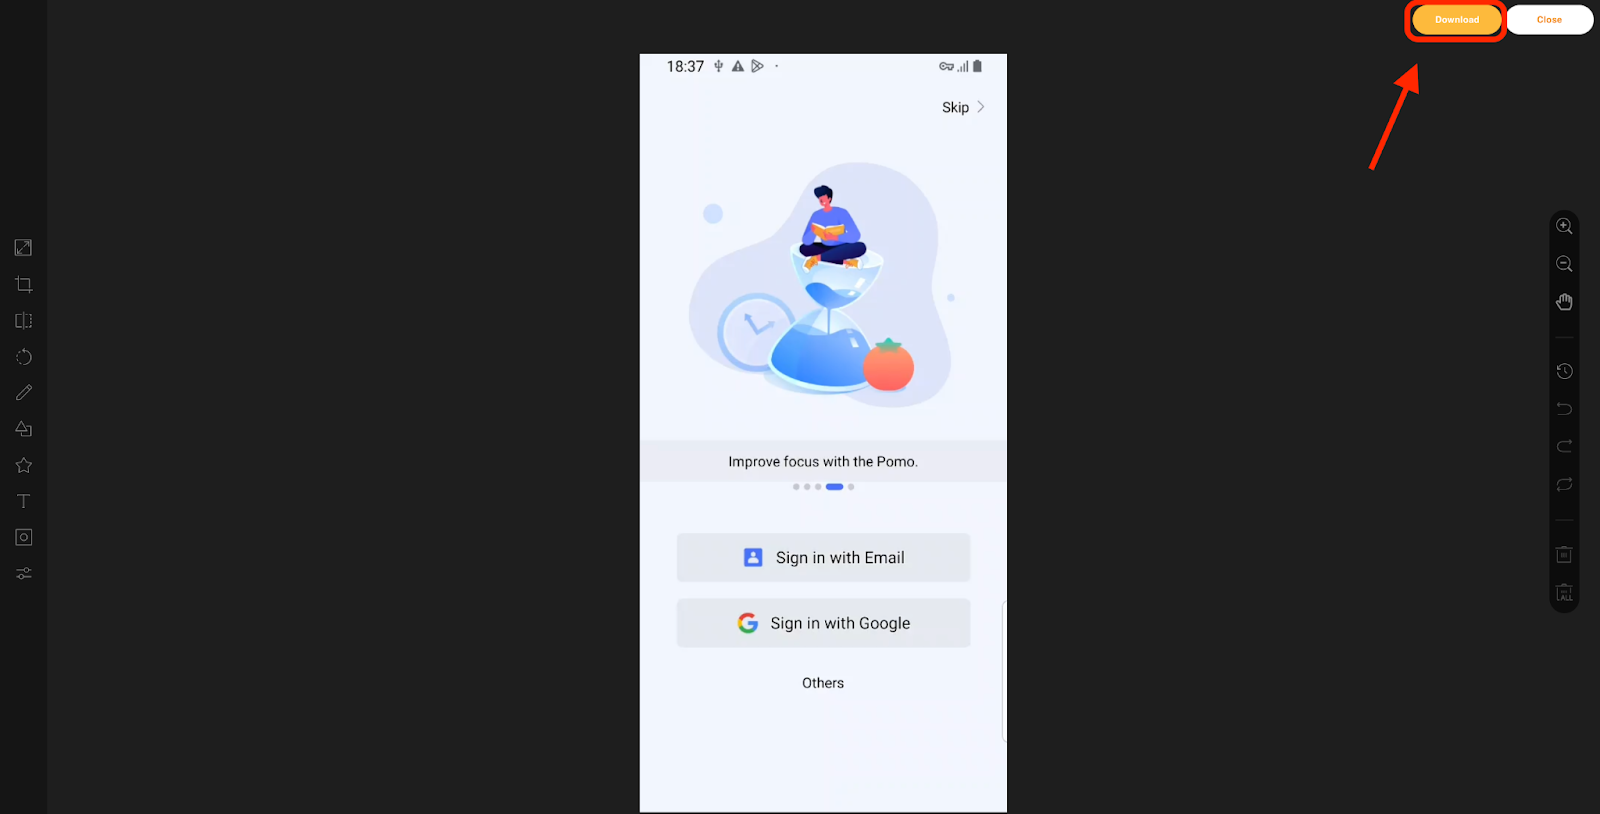
After selecting, your app will open to a still photo. Click the yellow “Download” button in the top right corner of your screen to save the screenshot.
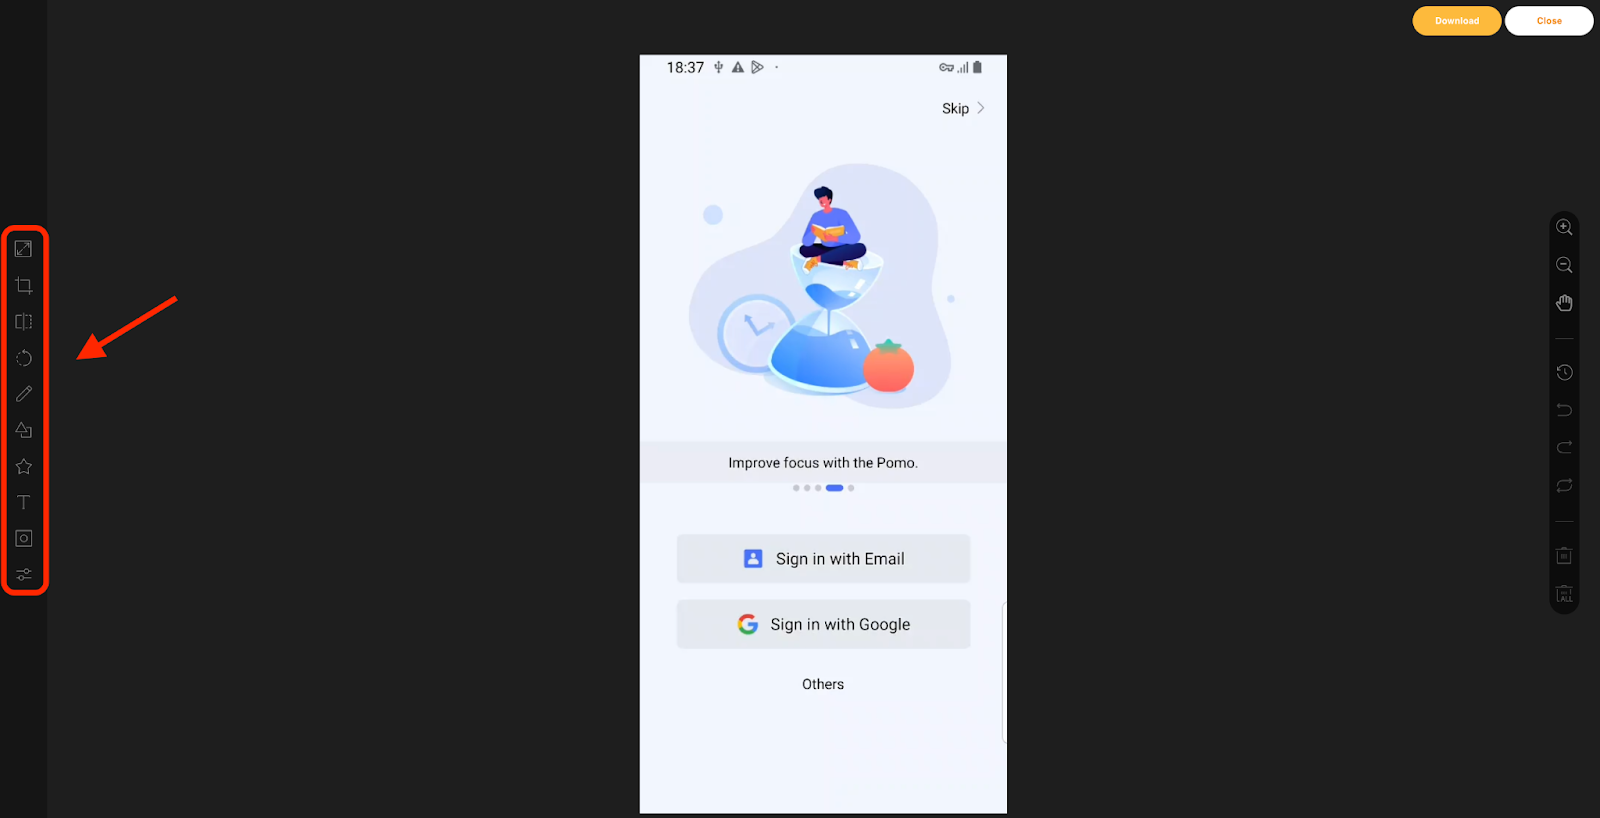
In the left toolbar, you’ll find options to crop, flip, rotate, draw, or add text, shapes, and icons.
How To Change GPS, Location, and Language
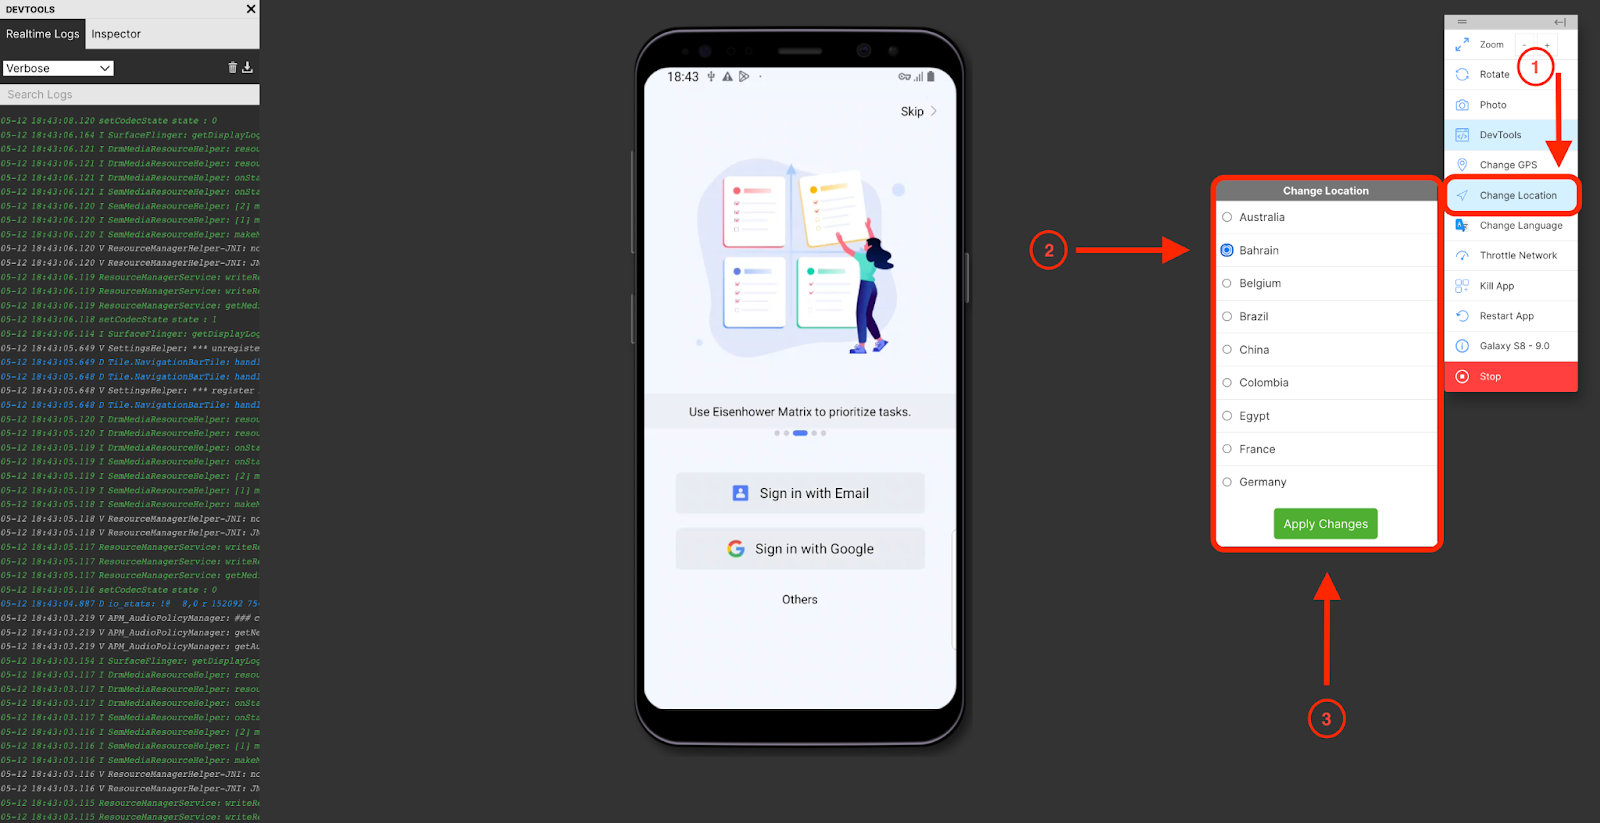
Find the Change GPS, Change Location, or Change Language tabs in the right toolbar and select the one you would like to change.
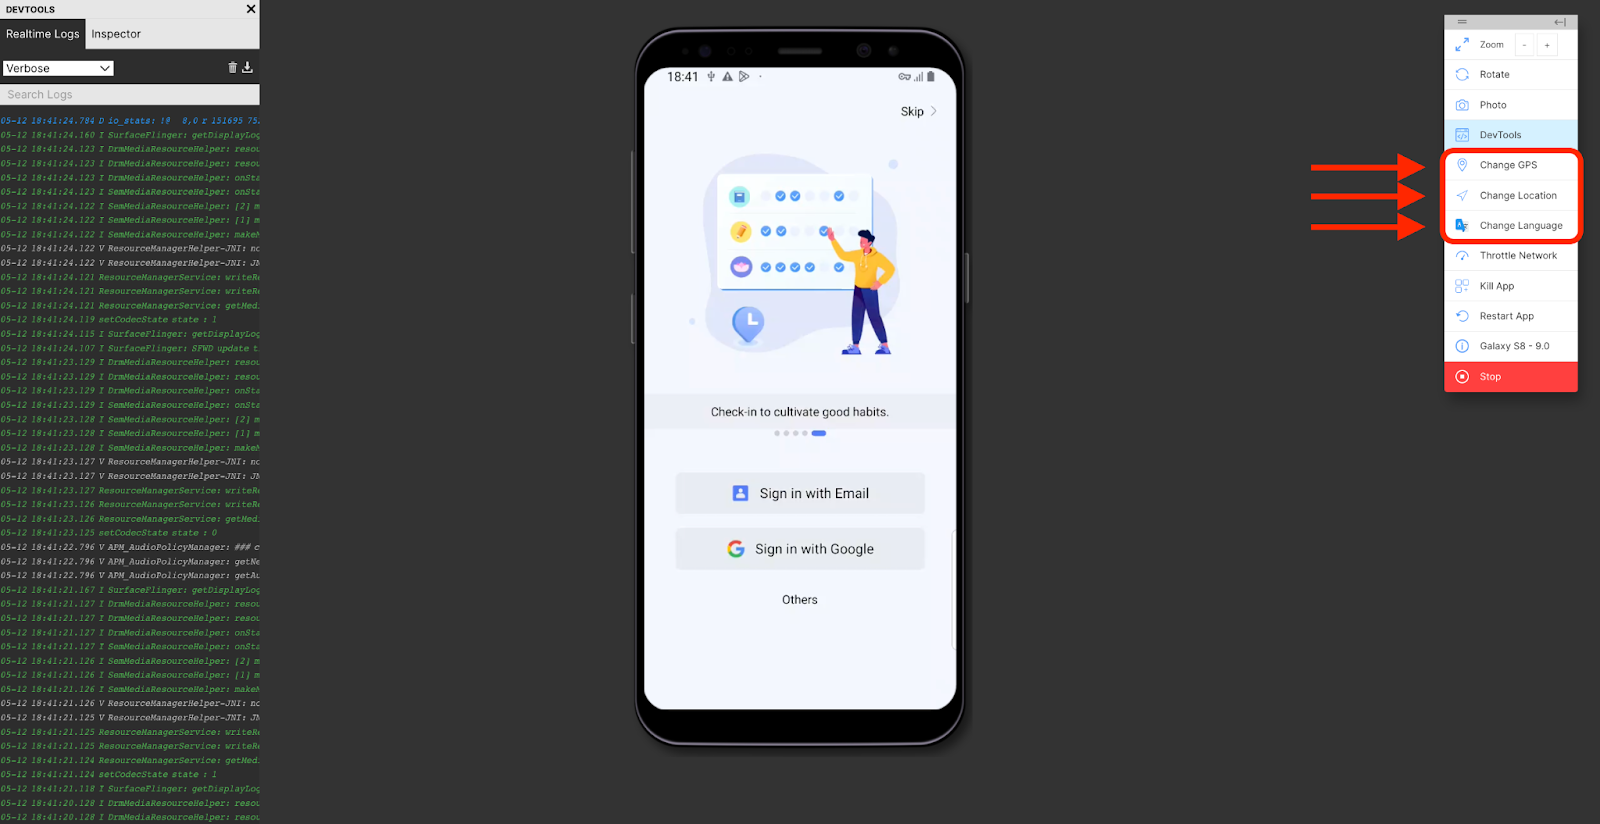
Once you select a tool, a prompt will appear. Select an option and click the green button to save your changes.
How To Upload an App Using TestFlight, App Store, or Google PlayStore
Choose the Install via TestFlight, App Store, or Google PlayStore option in the top left corner of the dashboard.
Then select the device you want to install the app in and click the green “Start” button.
You’ll be directed to the Google PlayStore, App Store, or TestFlight interface, where you can log in using your Google or Apple ID.
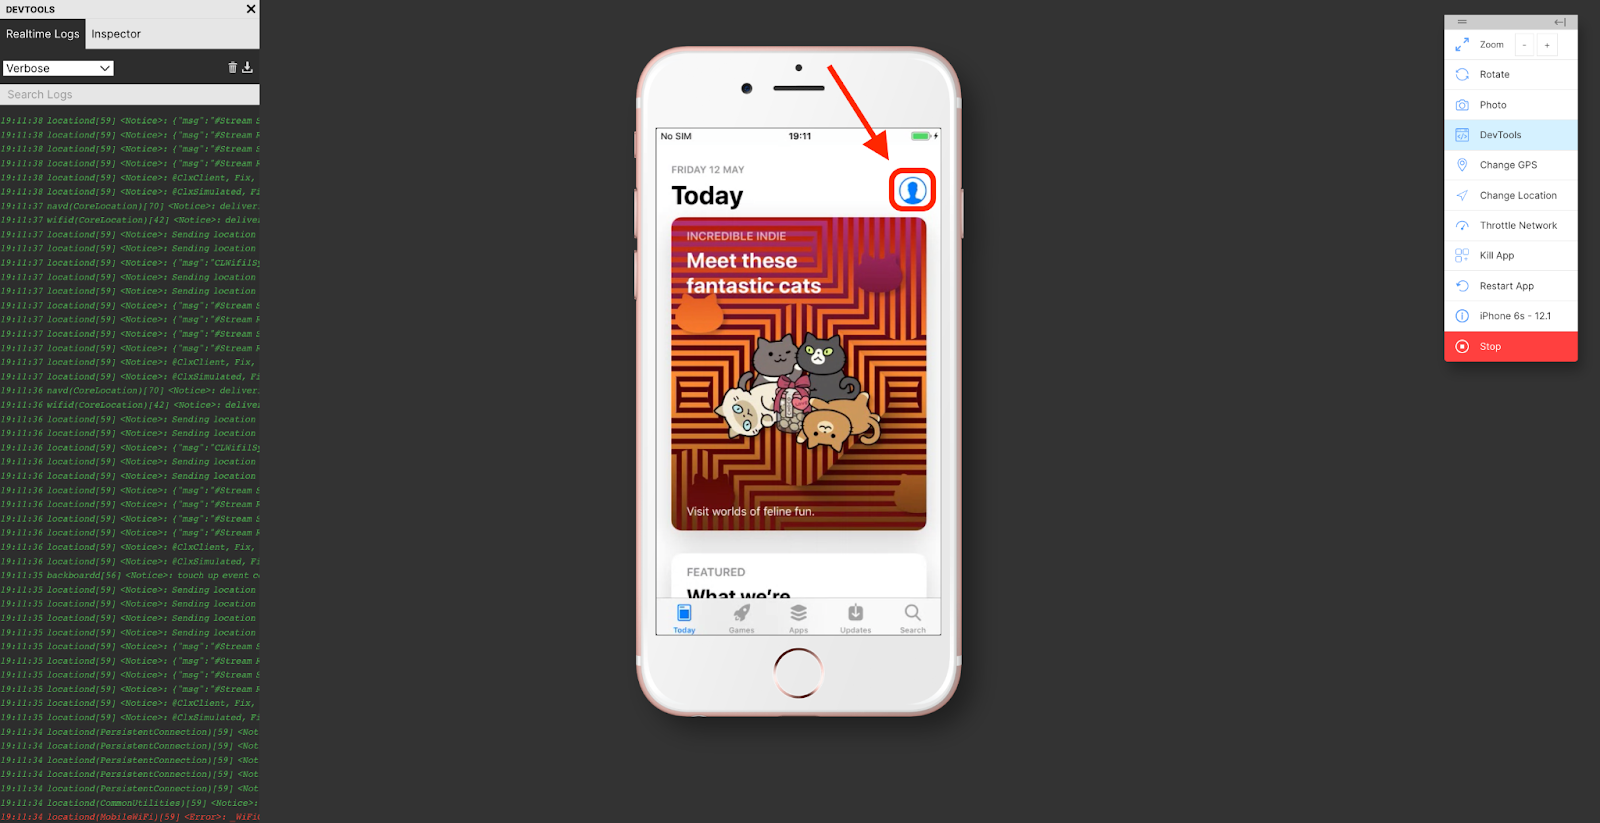
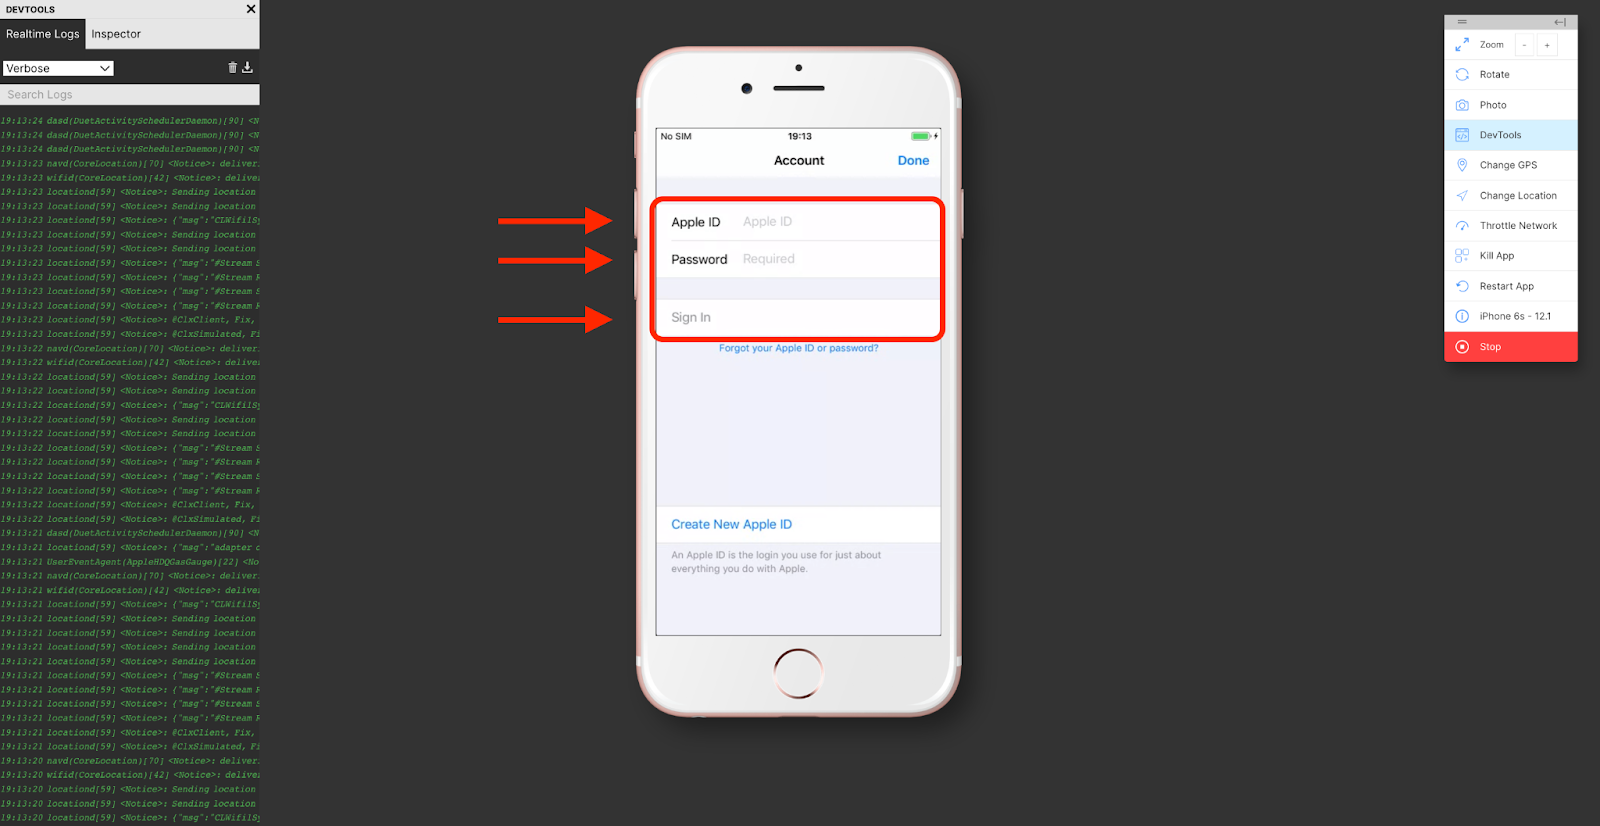
Once you are signed in, you will be able to install and test the app.
How To Throttle the Network When Testing an App
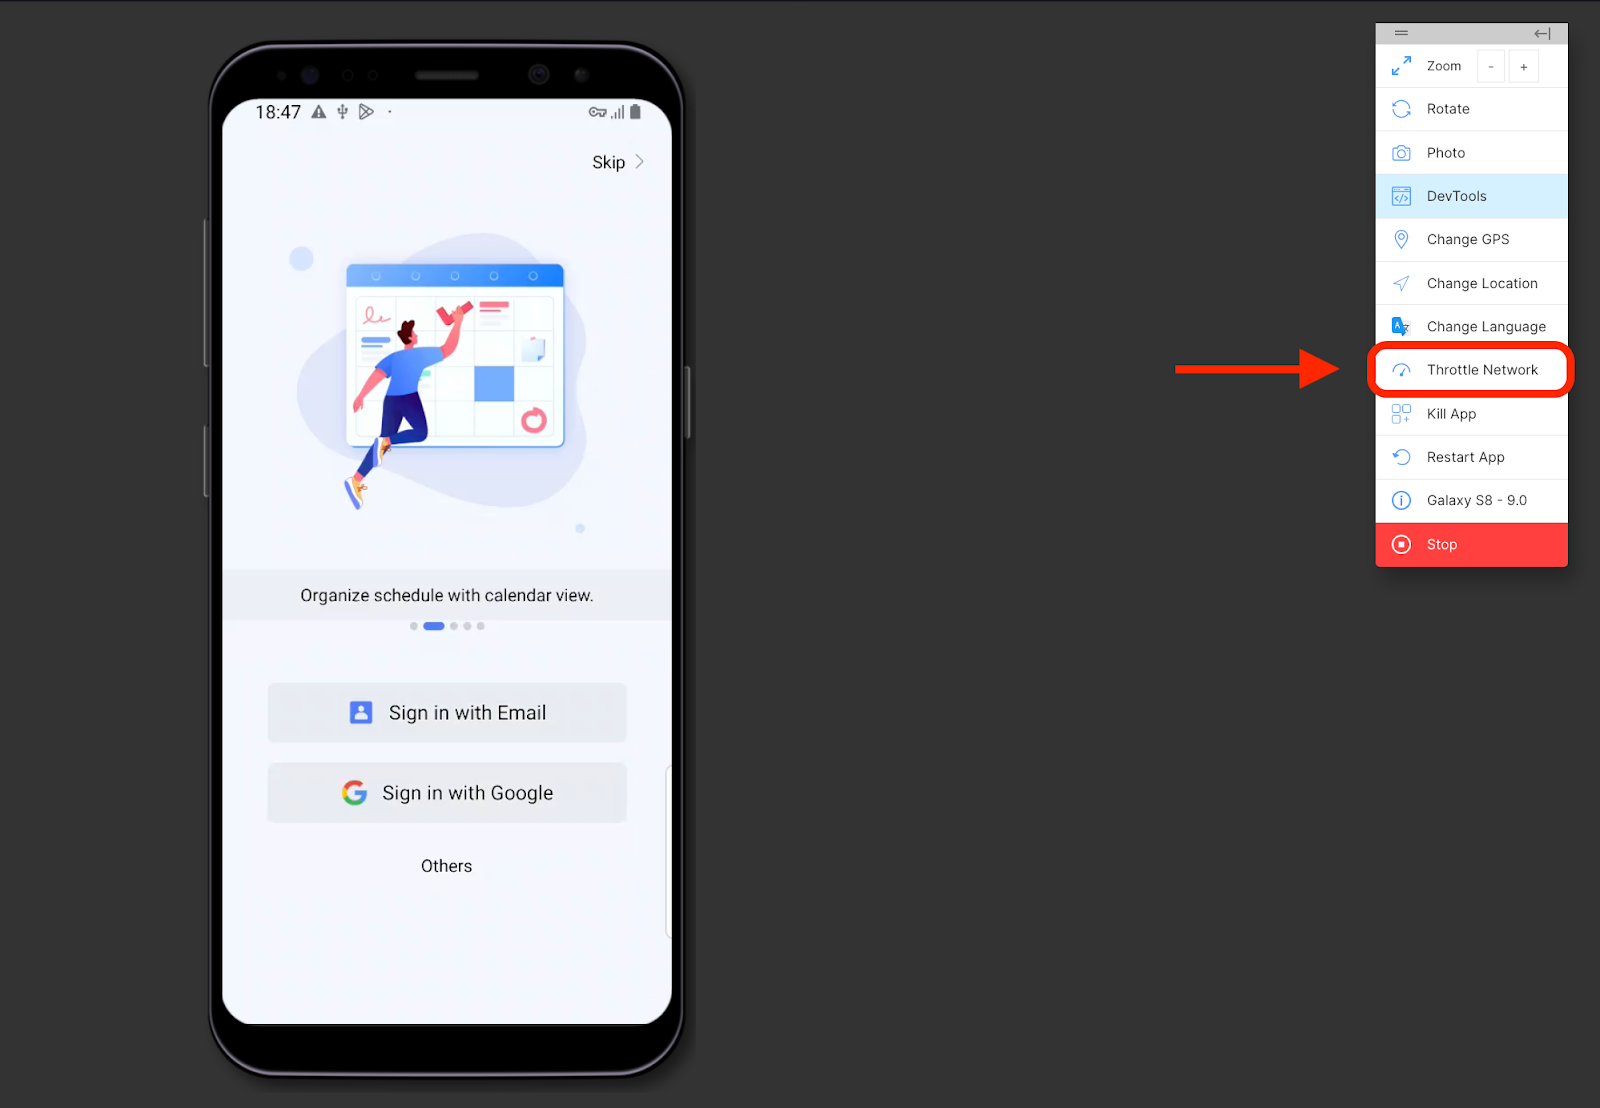
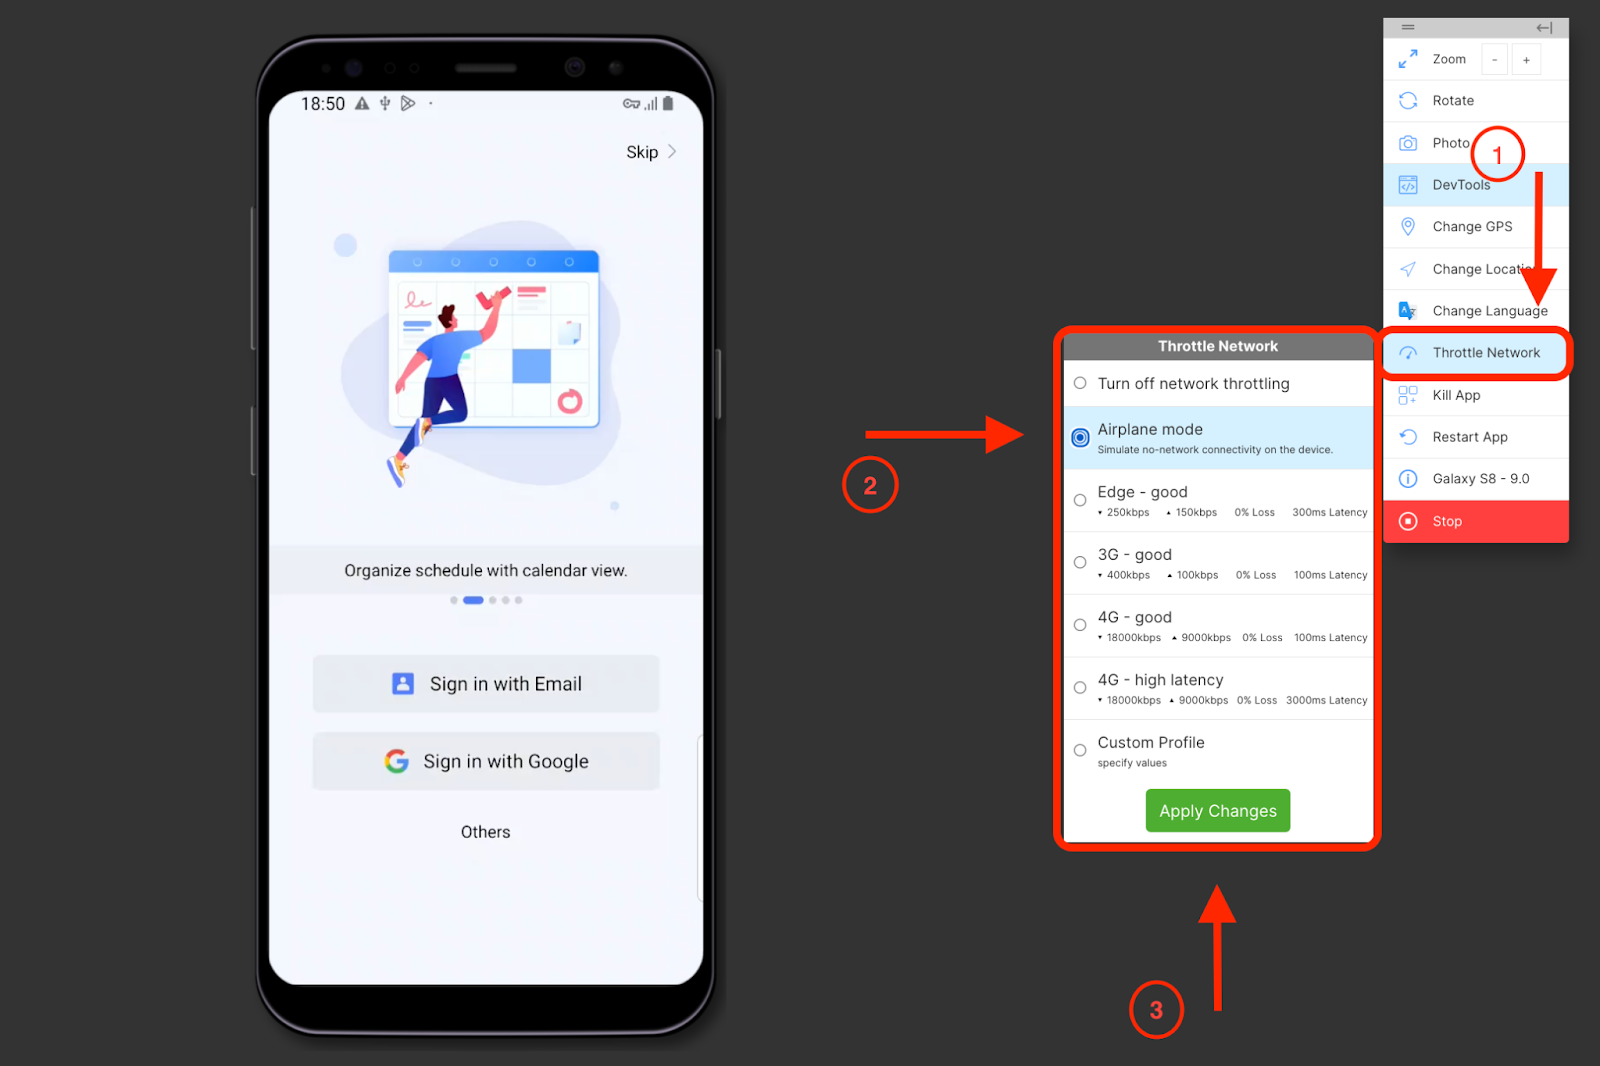
Choose the “Throttle Network” tab in the right toolbar.
Choose a new type of network to test and select the green “Apply Changes.”
How To Kill, Restart, or Stop Session
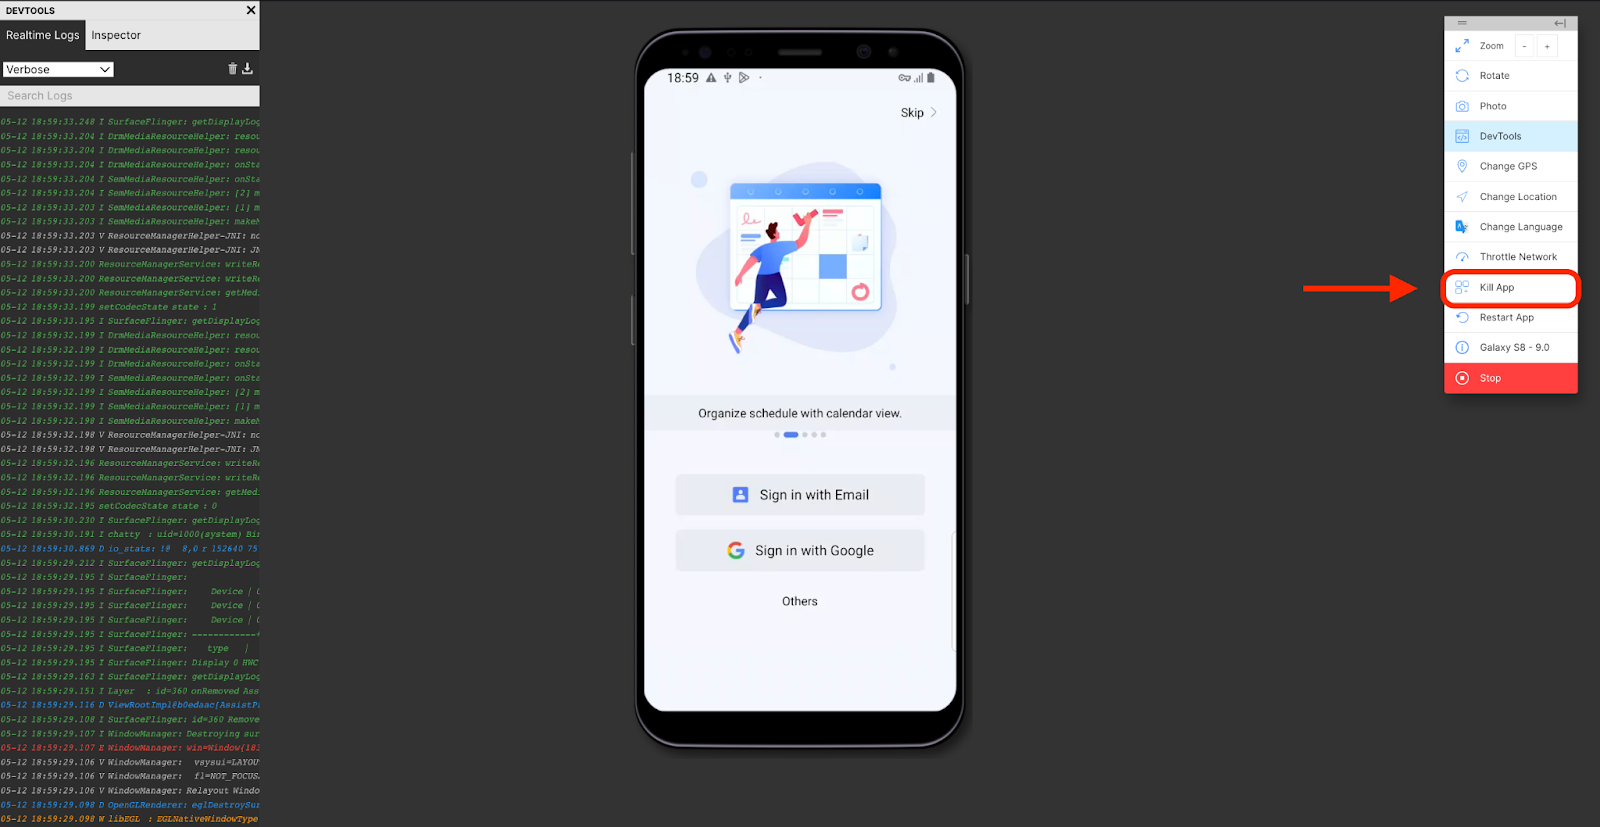
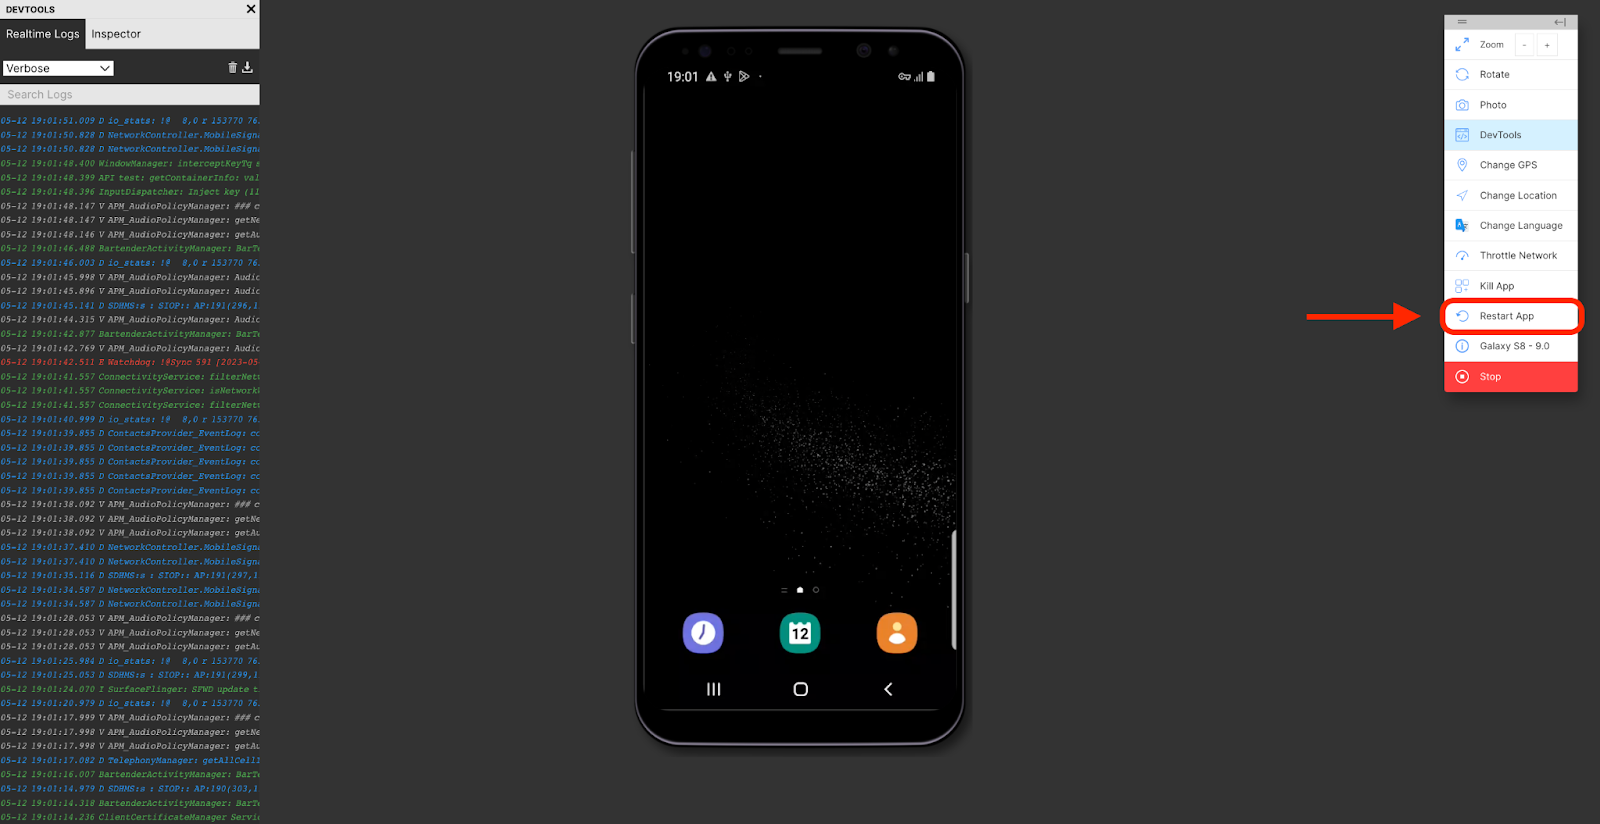
Start by finding the “Kill App,” “Restart App,” and “Stop” tabs in the right toolbar.
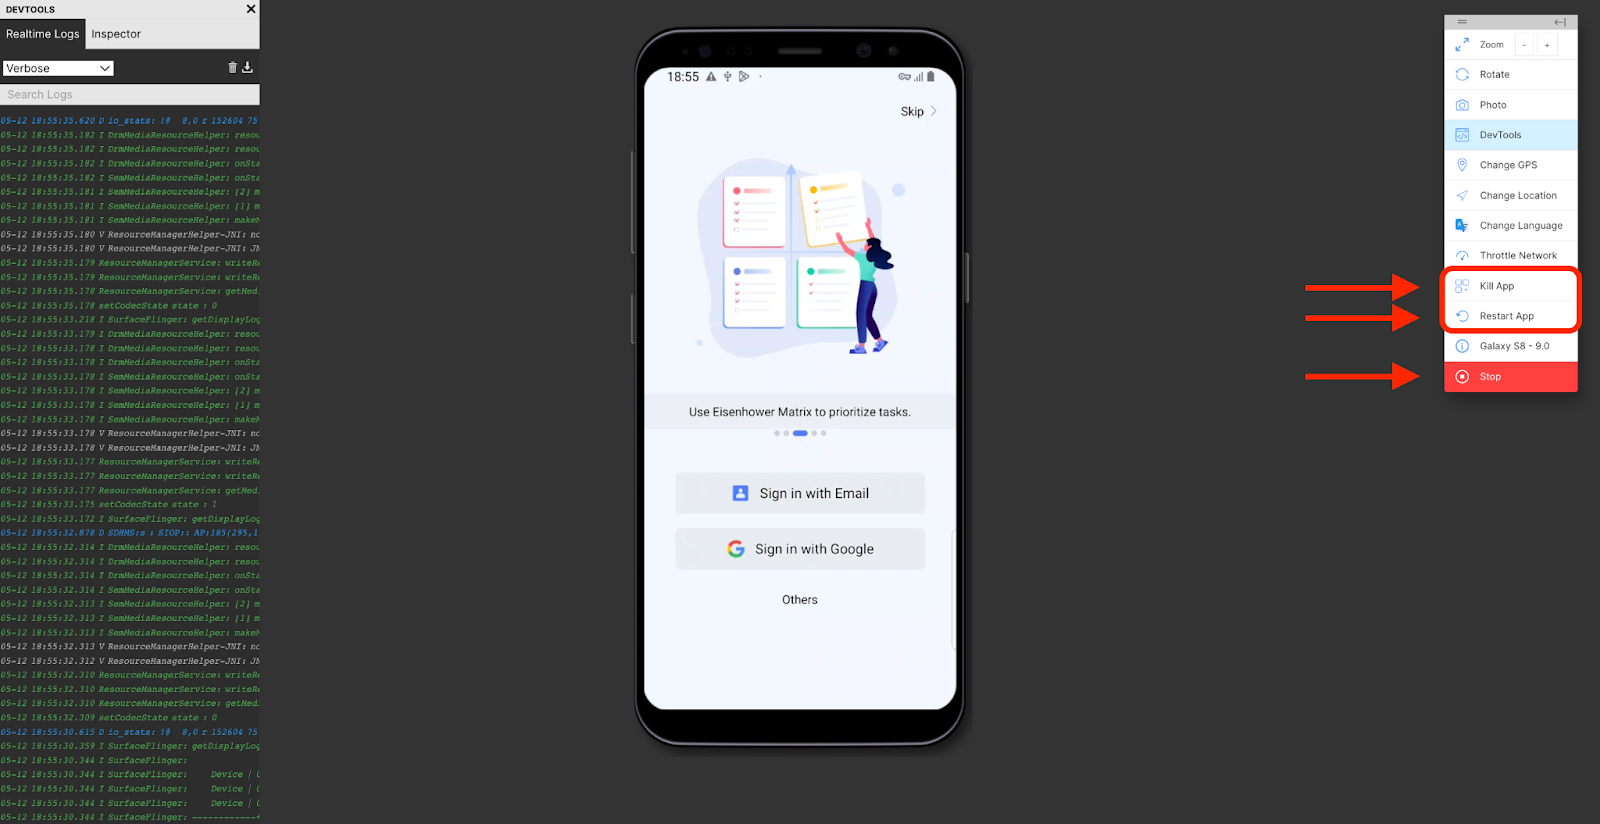
To kill the app, which is the equivalent of a user closing the app on their phone, click on the “Kill App” tab and you will be taken back to the test device’s home screen.
If the app you’re testing does not work or you want to start over, select the “Restart App” tab. The app will restart and you can interact with it from the beginning.
When you feel you have tested the app and all its features, click the red “Stop” button in the toolbar to end your session.
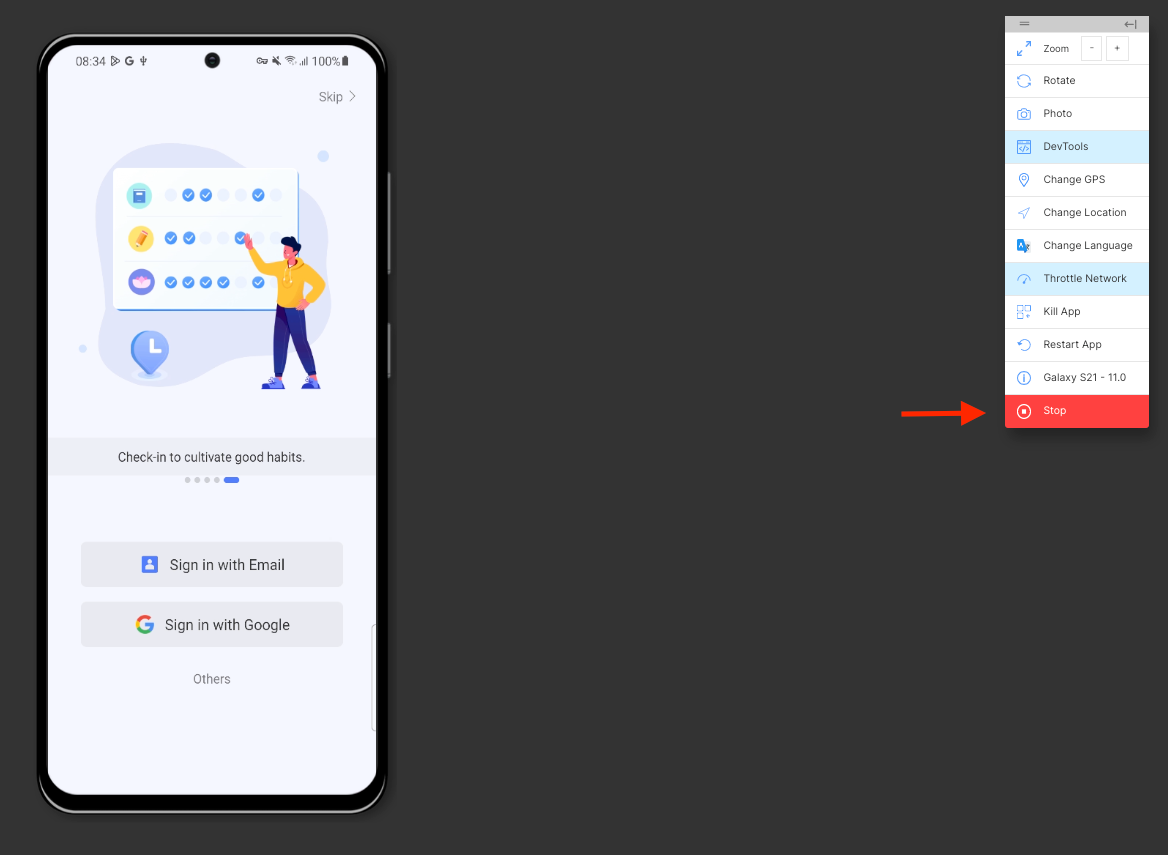
The session will stop and you will be redirected back to the dashboard where you can test your next device, and all data and credentials will be erased.
Frequently Asked Questions
If you have other questions about the App Center or the Mobile App Tester, please email us directly at app-center@semrush.com.